User Manual
Desktop
Version 1.1.8
OrpheLink Setup & Device Provisioning Guide
1. Sign up for an OrpeLink Account
-
Apply for and register an OrpheLink account.
-
please register a new account by clicking the link below:
2. Download and Install Software
- Download the corresponding OrpheAgent application for your operating system.
- Download from O'preuba website
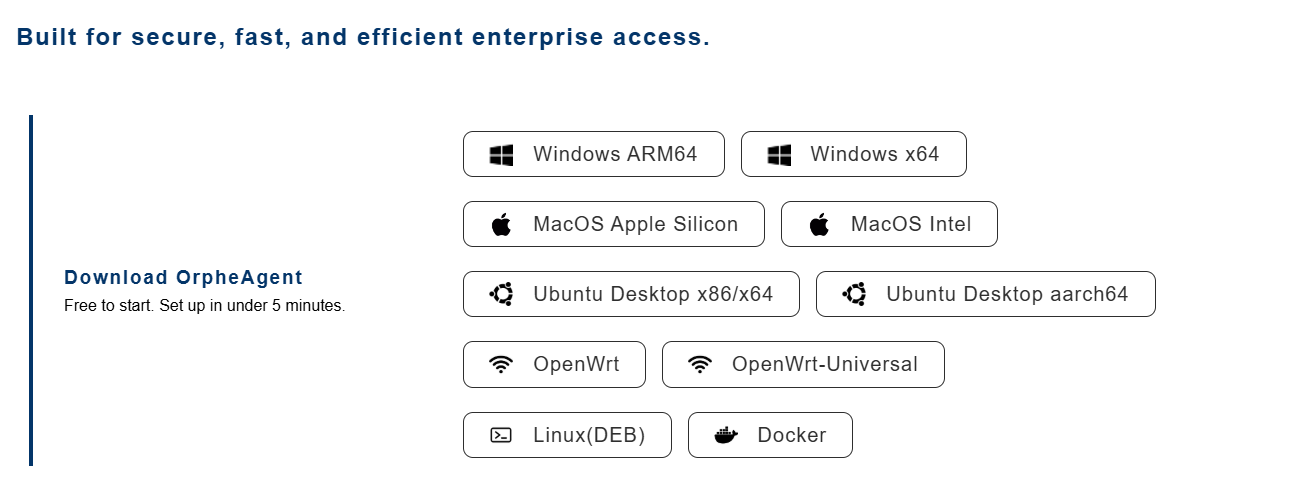
A. For Windows & macOS Users
-
Installation: Simply double-click the downloaded Installer file.
-
Action: Follow the on-screen setup wizard instructions to complete the installation.
B. For Linux Users
-
Installation: Open the Terminal and navigate to the directory where the file is downloaded.
-
Command: Execute the following command to install (using the ARM64 version as an example):
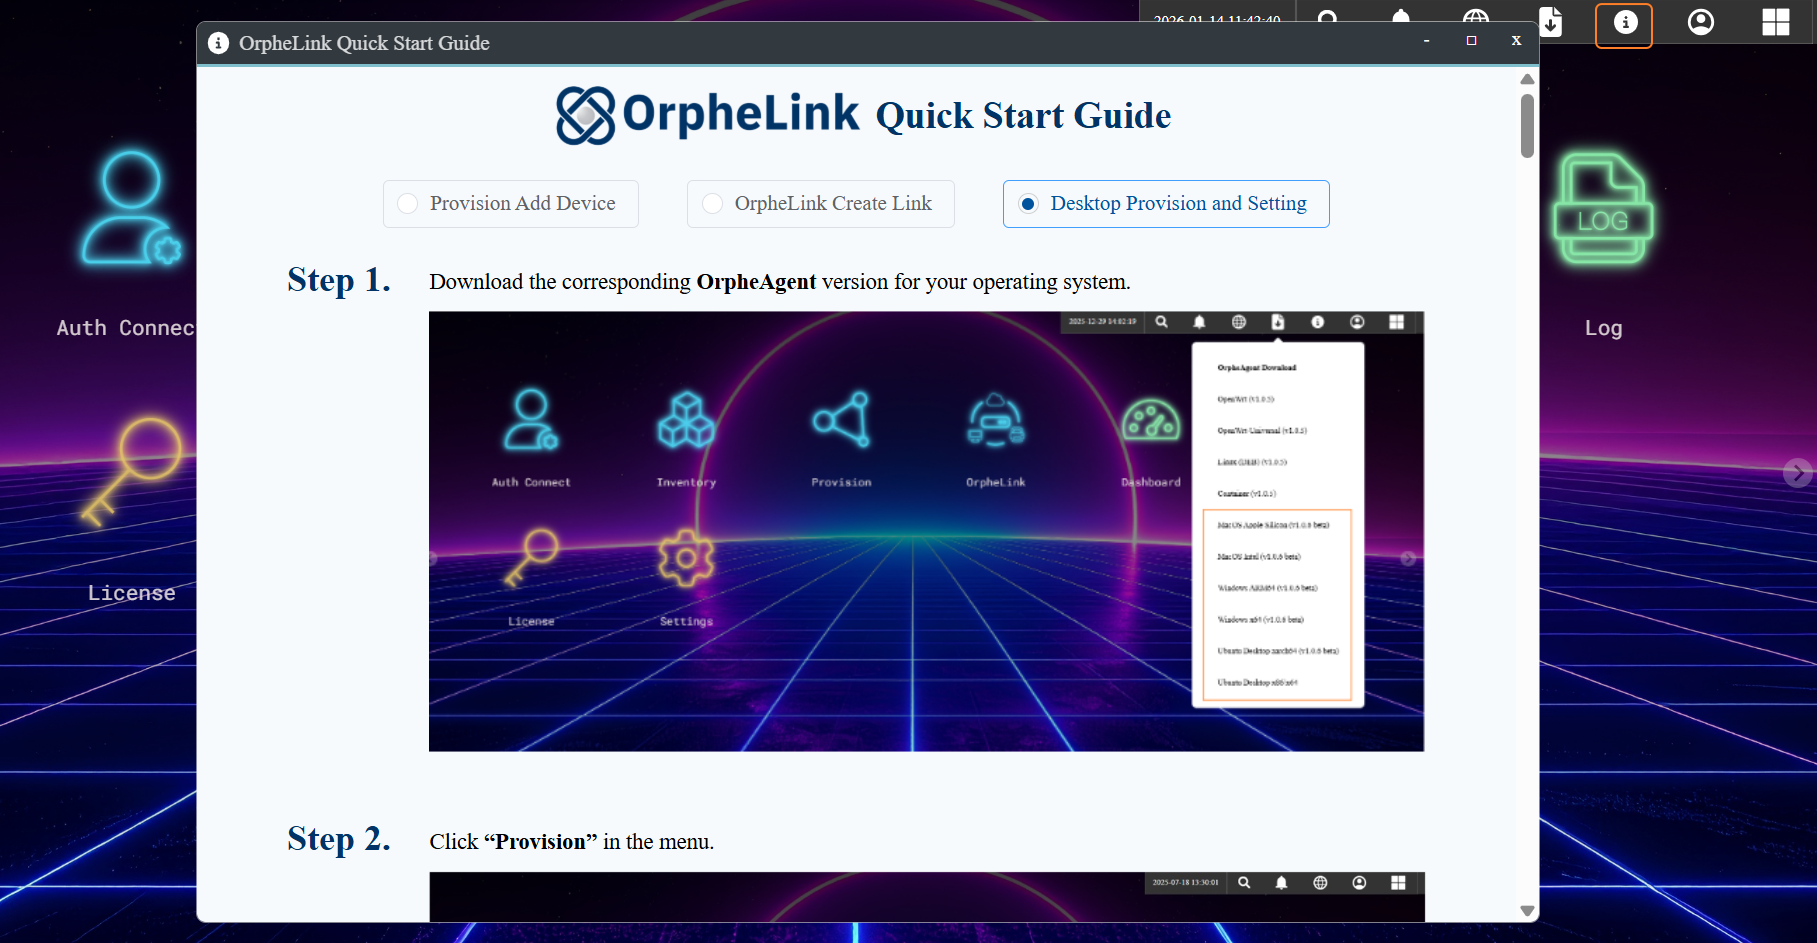
Bash sudo dpkg -i OrpheAgent-1.1.1-Installer-ARM64.deb - click the Information icon at the top right corner of the screen.
- The OrpheLink Quick Start Guide window will open.
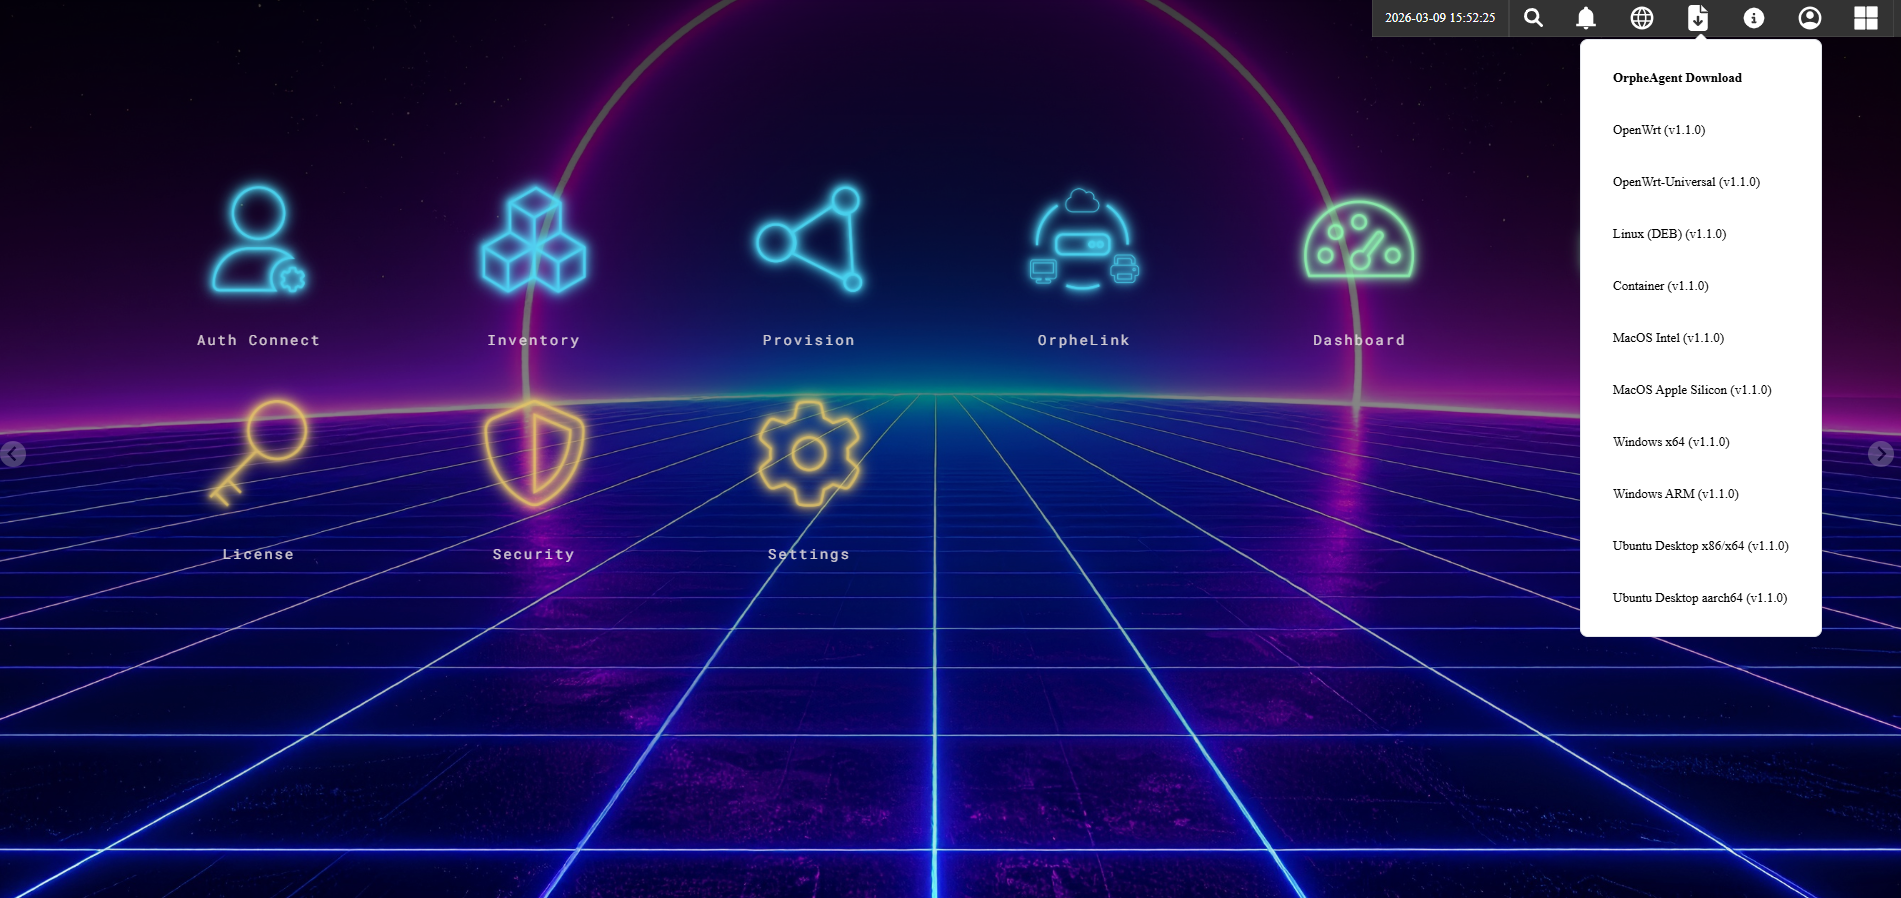
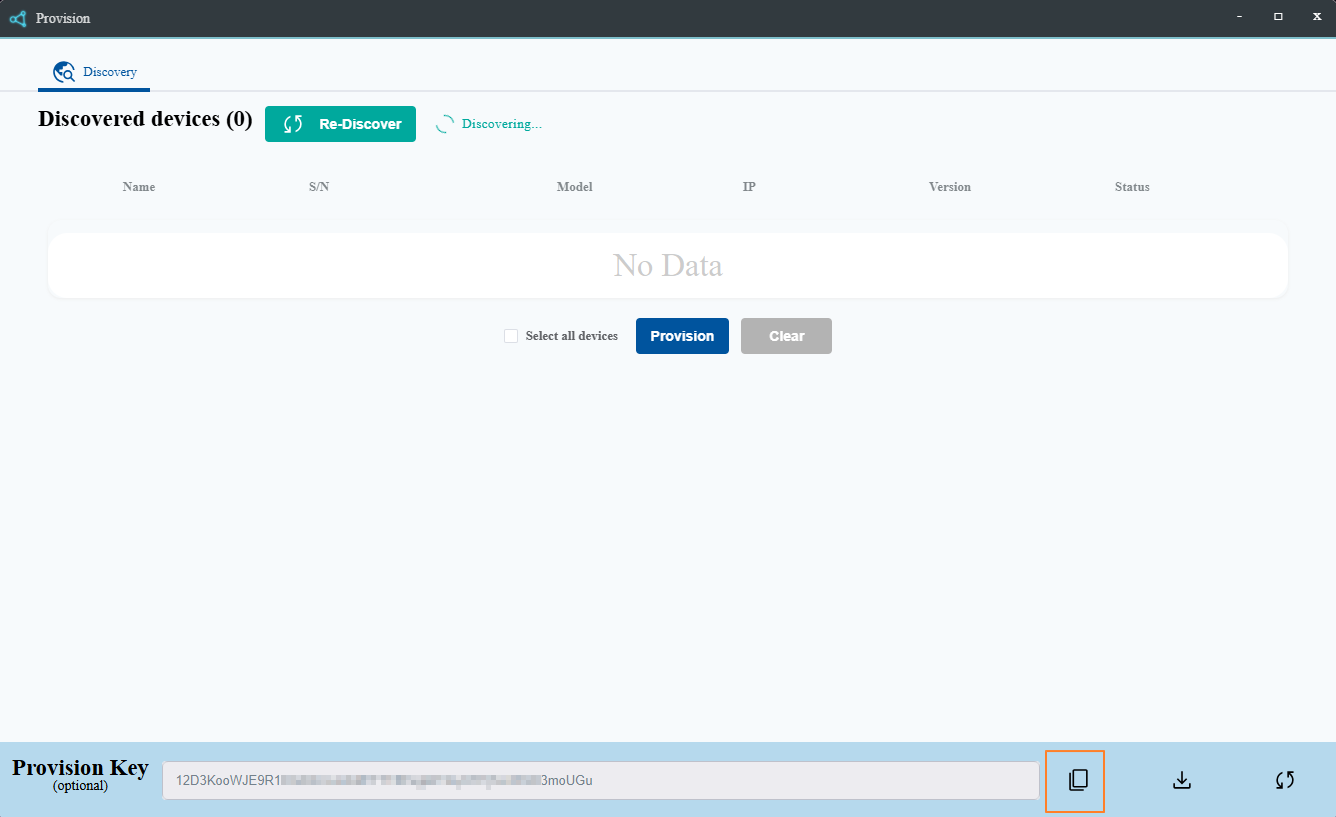
3. Obtain Provision Key
- Log in to the OrpheLink web dashboard.
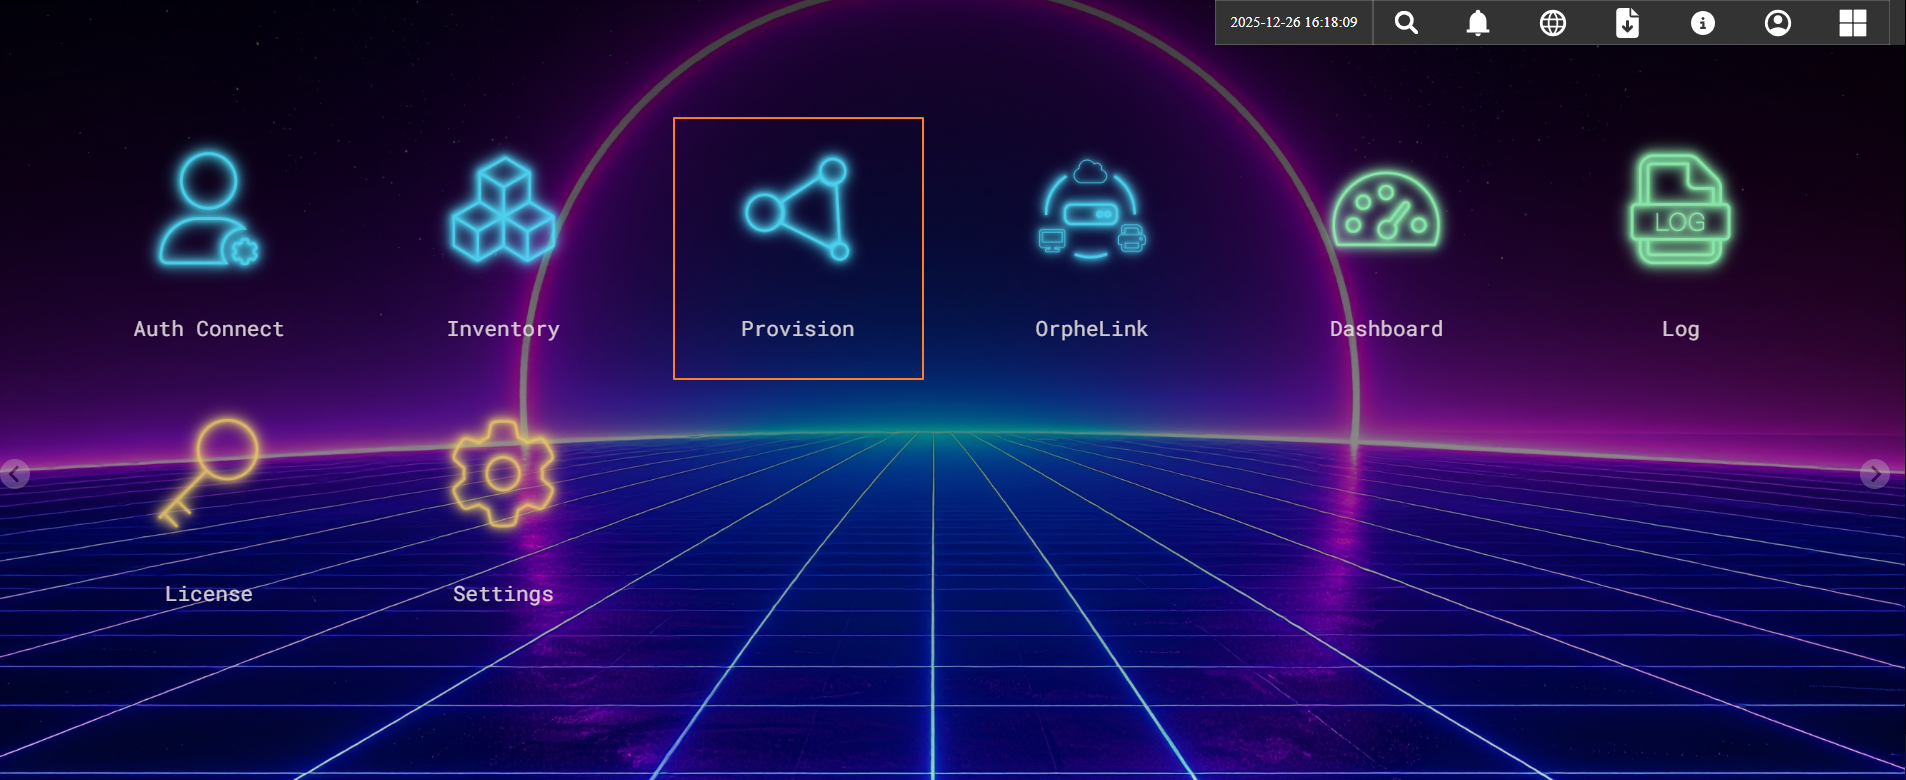
- Navigate to the Provision icon.
- Copy the Provision Key displayed at the bottom of the screen.
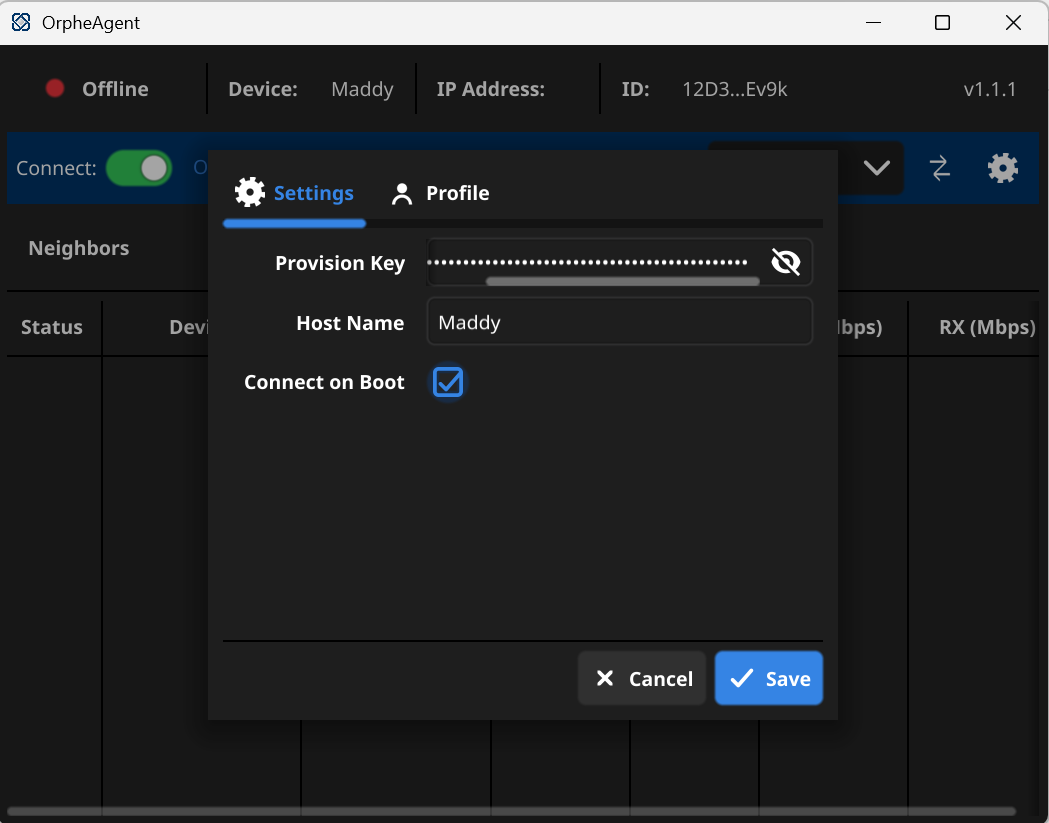
4. Configure OrpheAgent (Desktop App)
- Open the OrpheAgent software on your compute
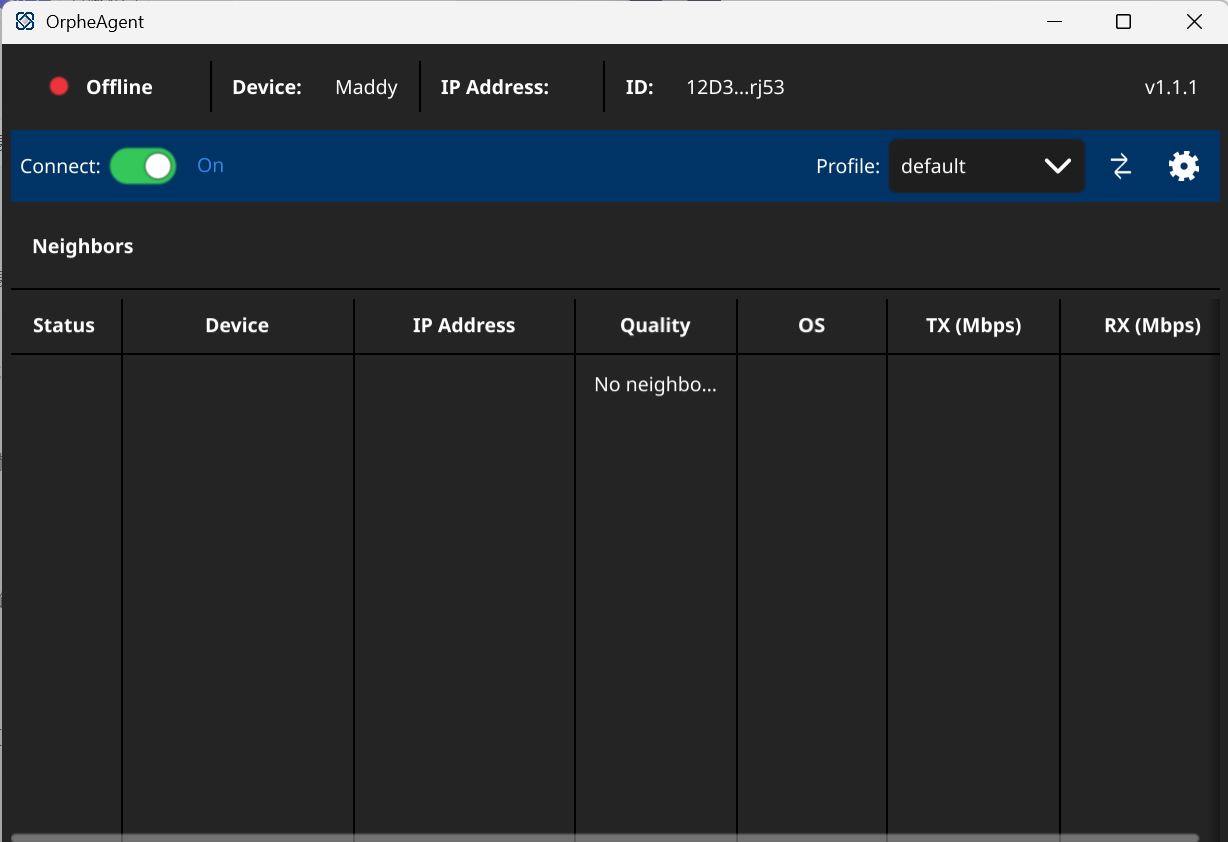
- Click setting icon > Go to Settings
- Paste the key into the "Provision Key" field.
- Enter a Host Name and click Save.
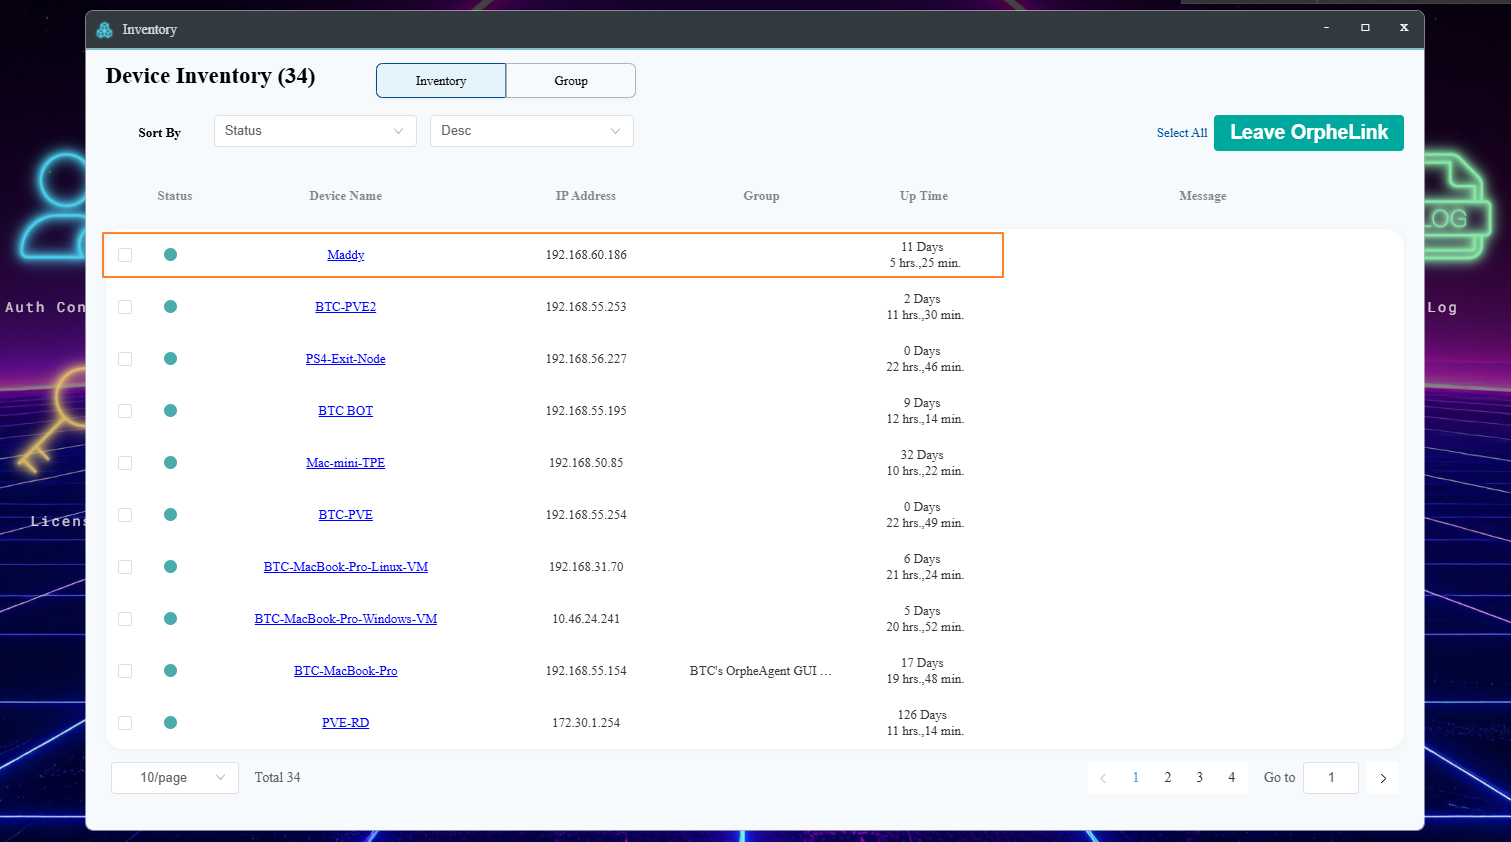
5. Provision Device to Inventory
- Return to the OrpheLink web and click Provision icon
- The device should appear under "Discovered devices".
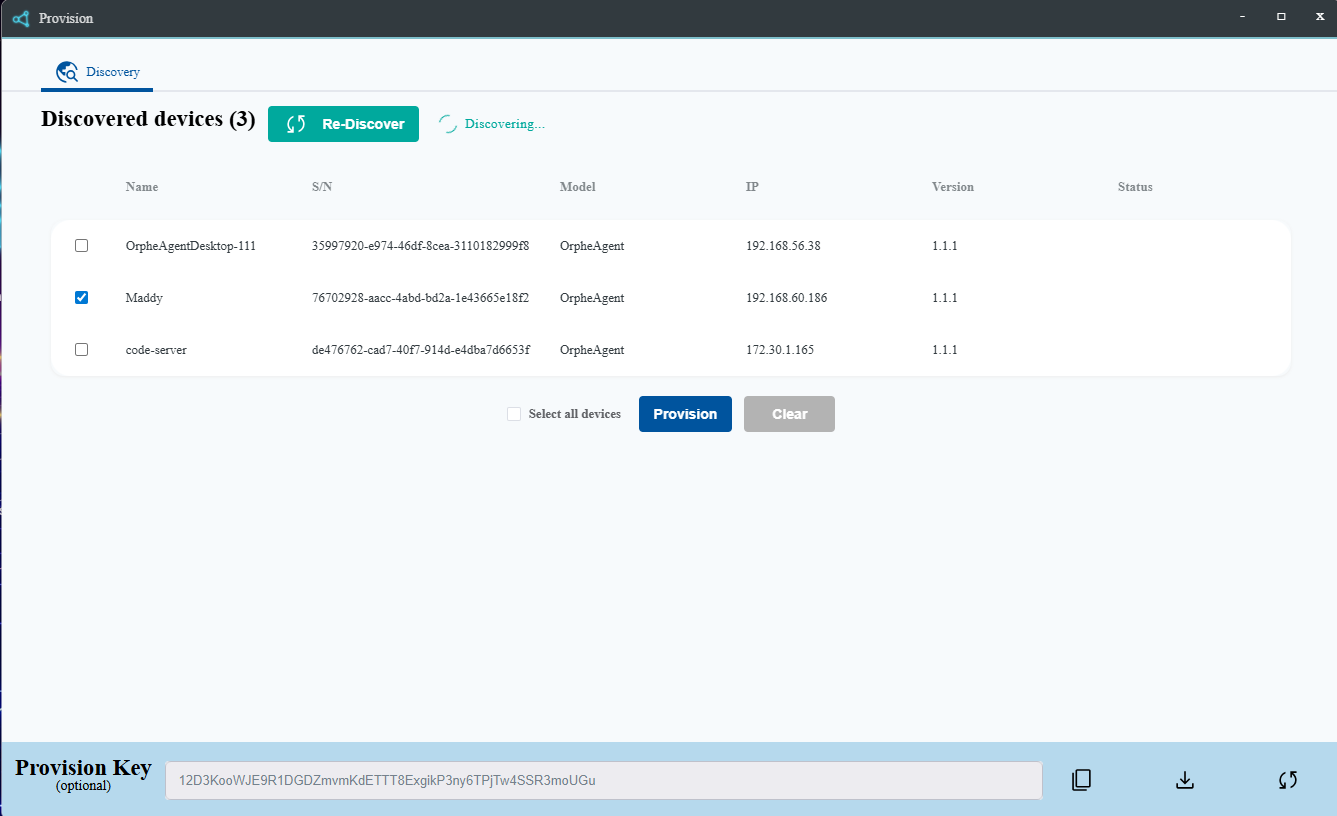
- Select the device and click Provision icon.
- Go to the Inventory tab to verify that the device is listed and its status is Active.
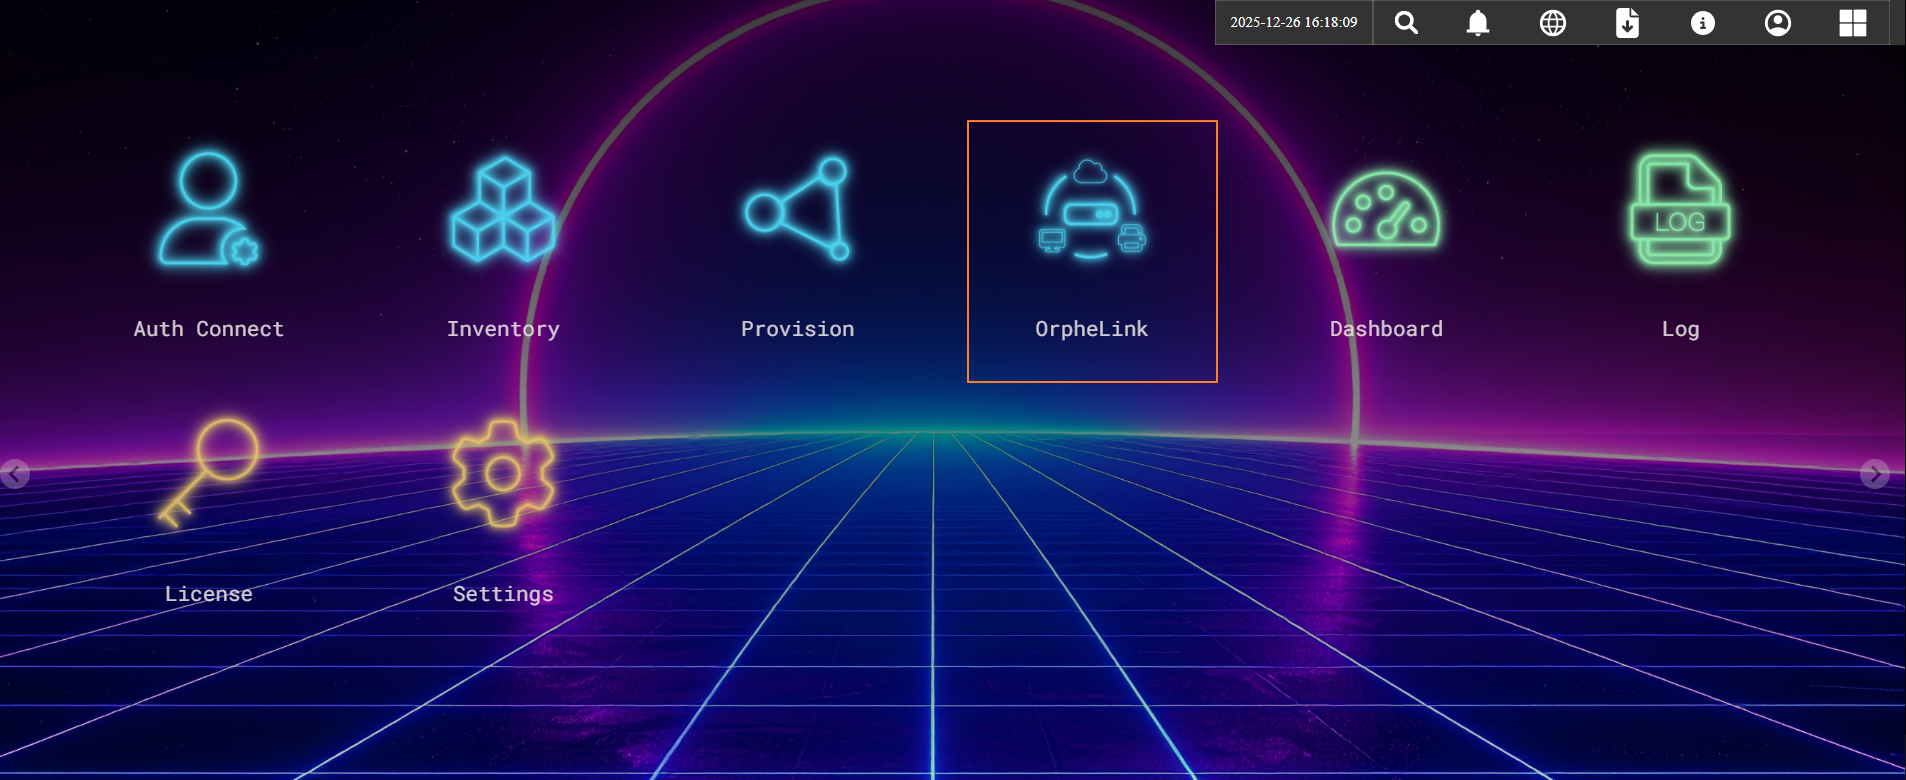
6. Establish Data Plane Connection
- Navigate to the OrpheLink icon in the web dashboard.
- Add a New Site
- Click the Add Site button.
- Configure Site Details
- Enter the desired name in the Site Name field.
- Select the appropriate OrpheAgent device from the list.
- Set Network Preferences
- Set the Tunnel IP configuration to Auto.
- Configure Neighbors
- In the Neighbors section, select the target OrpheAgent device you need to connect with.
- Save: Click the Save icon to apply changes.

Configuration Steps for OrpheLink Subnets
- Open Node Map: Click the "Get Node Map" at the top right.
- Select Site: On the Topology of Site screen, click on your target site.
- Select Node: Click the specific OrpheAgent (node) you wish to configure.
- Edit Links: In the side panel, click the Edit icon next to the agent name.
- Add Subnet: * Click the "+" button.
- Togle the Exit node
- Enter the internal IP Address and Mask (e.g.,
192.168.22.0/24) of the resources you want to share. - Save: Click the Save icon to apply changes.

© 2025 O’Prueba. All rights reserved.| Privacy Policy


This website uses cookies to improve user experience. By
clicking agree you consent to all cookies in accordance with our Cookie Policy.