User Manual
General
Version 2.1
-
General
-
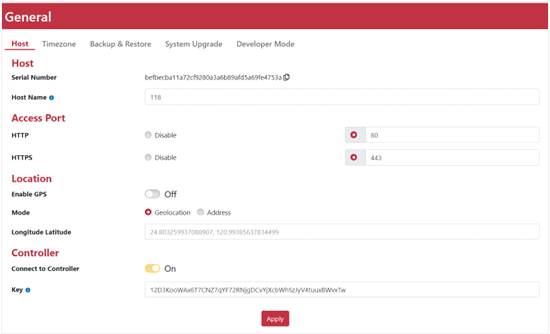
Host
General management includes device information, location setting, connect to OOS controller, time, backup & restore and system upgrade.
|
Name |
Description |
|
Host Name |
Setup device name. It will show on Login page. |
|
Local Access Configuration |
The default HTTP port is 80, and the HTTPS port is 443. You can manually change these settings in the Local Access Configuration. |
|
GPS |
Open the GPS and it will automatically retrieve location information. Please Notification that GPS signals may not be available indoors. |
|
Geolocation |
Manually input the GPS coordinates of your current location. |
|
Address |
Enter the Approximate address information manually. If you need a more precise location, input the latitude and longitude in the Geolocation feature. |
|
OOS Controller |
OOS Controller is a network management system that supports Zero Touch Provisioning (ZTP) and manages all OOS devices. |
|
Connect to OOS Controller |
if the OOS device is not controlled by the OOS Controller, there will be a field to input the OOS Controller key. Once it has been taken over, it will be replaced with a switch button that allows you to choose to exit the OOS Controller. |
Device setting Descriptions table
-
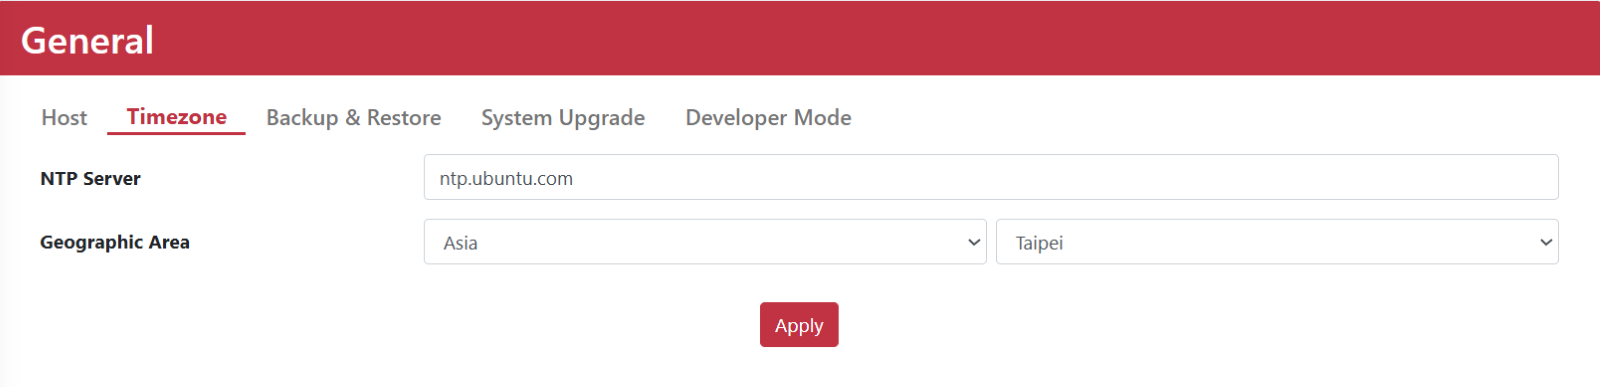
TimeZone
The Timezone setting includes NTP Server and Geographic Area configurations to ensure accurate system time.
|
Name |
Description |
|
NTP Server |
The NTP Server field lets users set a Network Time Protocol server for time synchronization. By default, it uses ntp.ubuntu.com, meaning the device will sync its time through Ubuntu’s official NTP server. |
|
Geographic Area |
Select region and city to configure the correct Timezone from dropdown menu. |
Time Setting Descriptions table
-
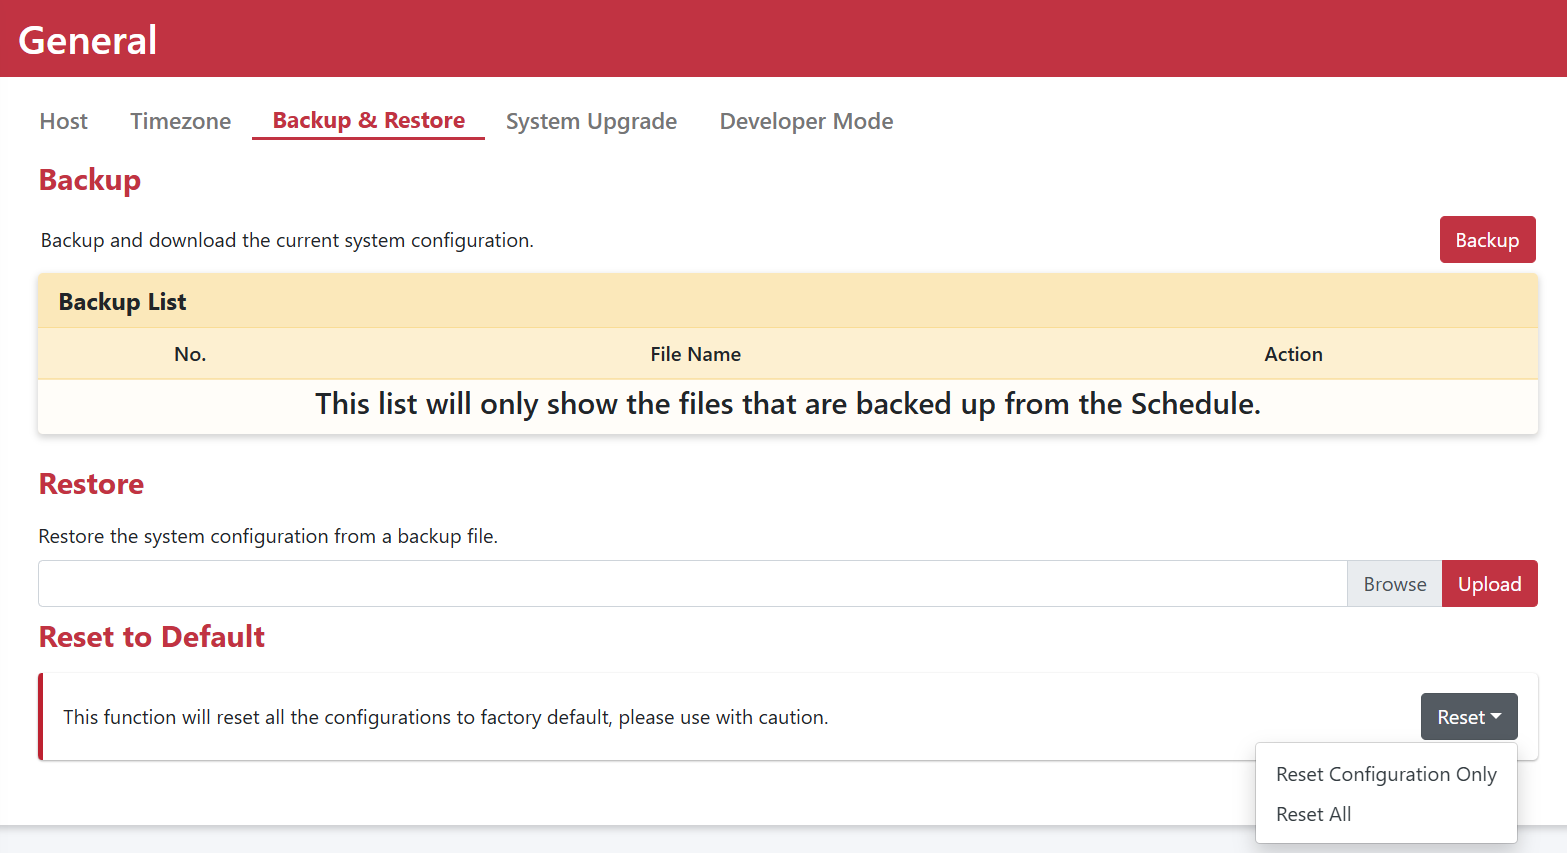
Backup & Restore
You can schedule regular backups to be performed automatically. The system will keep track of the five most recent versions, allowing users to choose the desired version for restoration.
|
Name |
Description |
|
Backup |
The system will keep track of the five most recent versions of backup, Users have the flexibility to select a specific version for performing actions such as restore, download, and deletion. |
|
Restore |
Upload configuration file for restoring. |
|
Revert to Factory Default |
Set factory default to original setting |
Restore
There are two methods for restoration.
Select a Backup Version:
-
Step 1. Go to Settings > General > Backup & Restore page.
-
Step 2. Select a backup version by Backup Management table.
-
Step 3. Click” Restore” icon.
-
Step 4. Click “Yes” button on confirmation message.
-
Step 5. Start to restore setting and reboot automatically.
Upload Files:
-
Step 1. Go to Settings > General > Backup & Restore page.
-
Step 2. Browse the backup file.
-
Step 3. Click “Upload” button.
-
Step 4. Pop-up “Confirmation” dialog box.
-
Step 5. Click “Yes” button.
-
Step 6. Start to restore setting and reboot automatically.
-
-
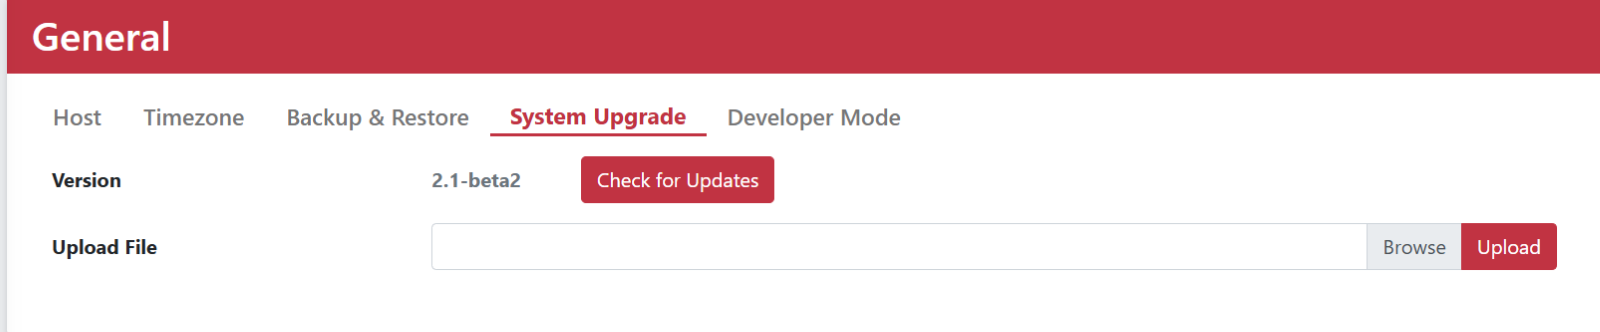
System Upgrade
System Upgrade allows you to check for new versions or upload files to perform software updates. This feature ensures that your system is always up-to-date with the latest enhancements and fixes by either automatically checking for new releases or allowing manual uploads of update files.
Name
Description
Software Version
Show current version.
Check for Upgrade
Detect new version and upgrade directly.
Software Upload
Manually upload the software image and upgrade it.
System Upgrade Description table
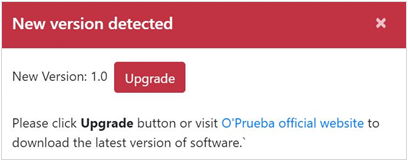
System Upgrade by Check for Upgrade
-
Step 1. Click “Check for Upgrade” to check whether new version release.
-
Step 2. Detect new version.
-
Step 3. Click “Upgrade”. It will upgrade automatically.
-
Step 4. Reboot after the upgrade is completed.
Developer Mode -
The Developer Mode feature enables users to open the Terminal directly from the GUI for advanced operations.
-
Step 1. Go to Settings > General> Host and copy the Host Serial Number (SN). The SN serves as the password for accessing the root-level operations.

-
Step 2. Go to Settings > General>Developer Mose. where a disclaimer will appear. Click Confirm to proceed.
-

-

-
Step 3. Type “ login”
-
Step 4. Paste the SN as the password to access terminal.

-
-
-


