User Manual
SDWAN Secure Option
Version 1.3
SDWAN Secure Option
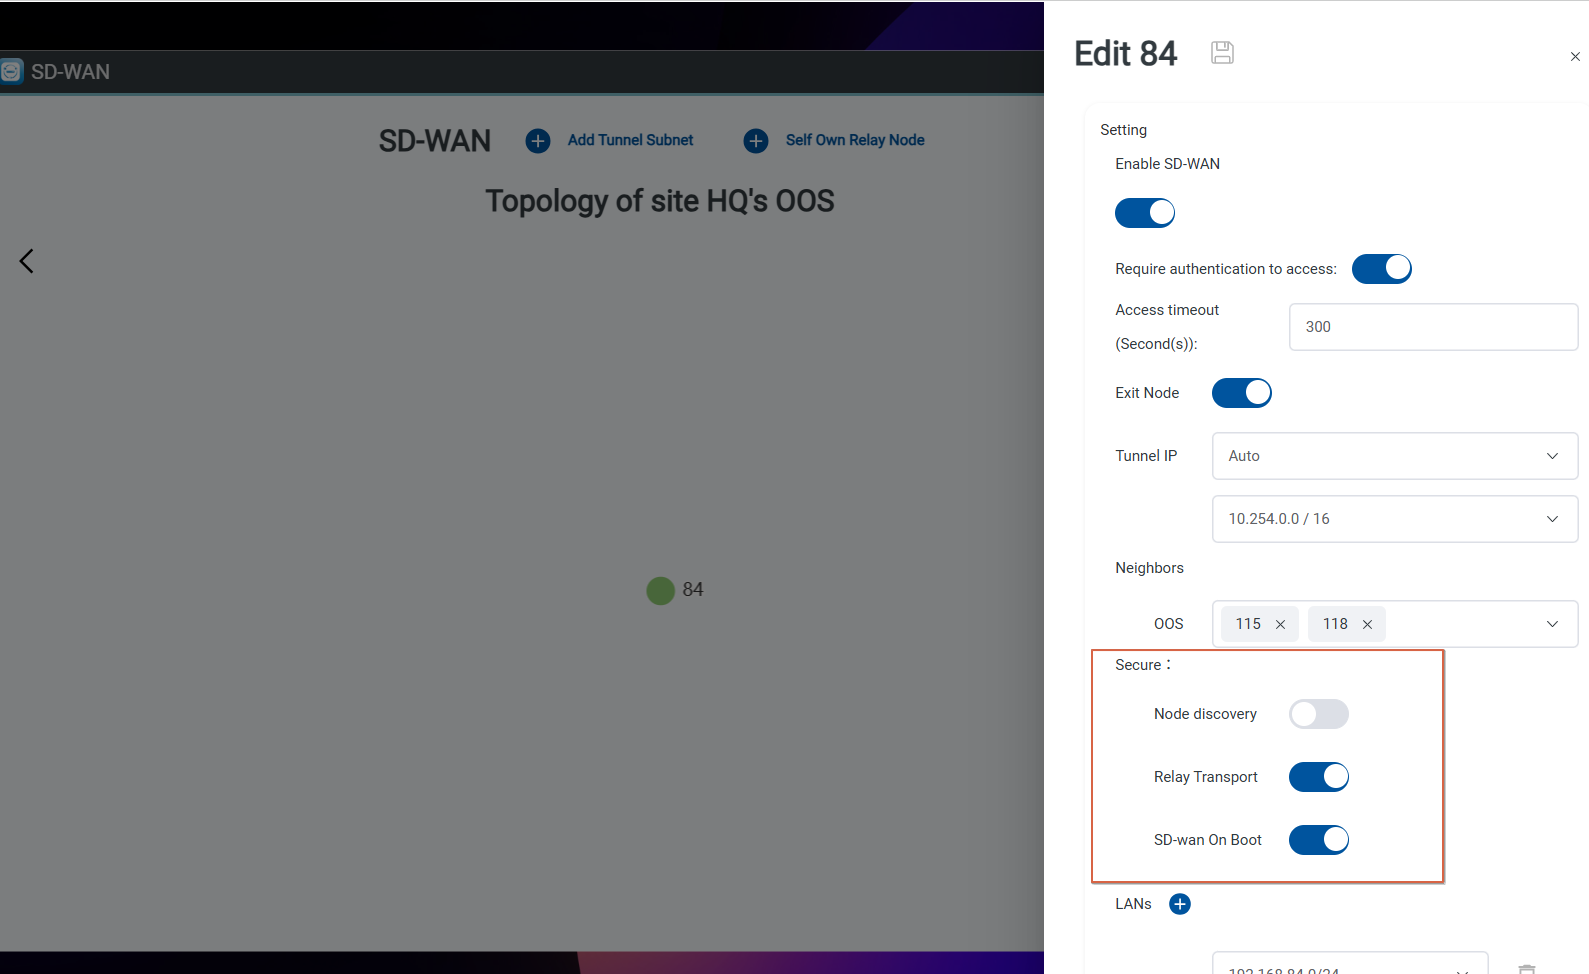
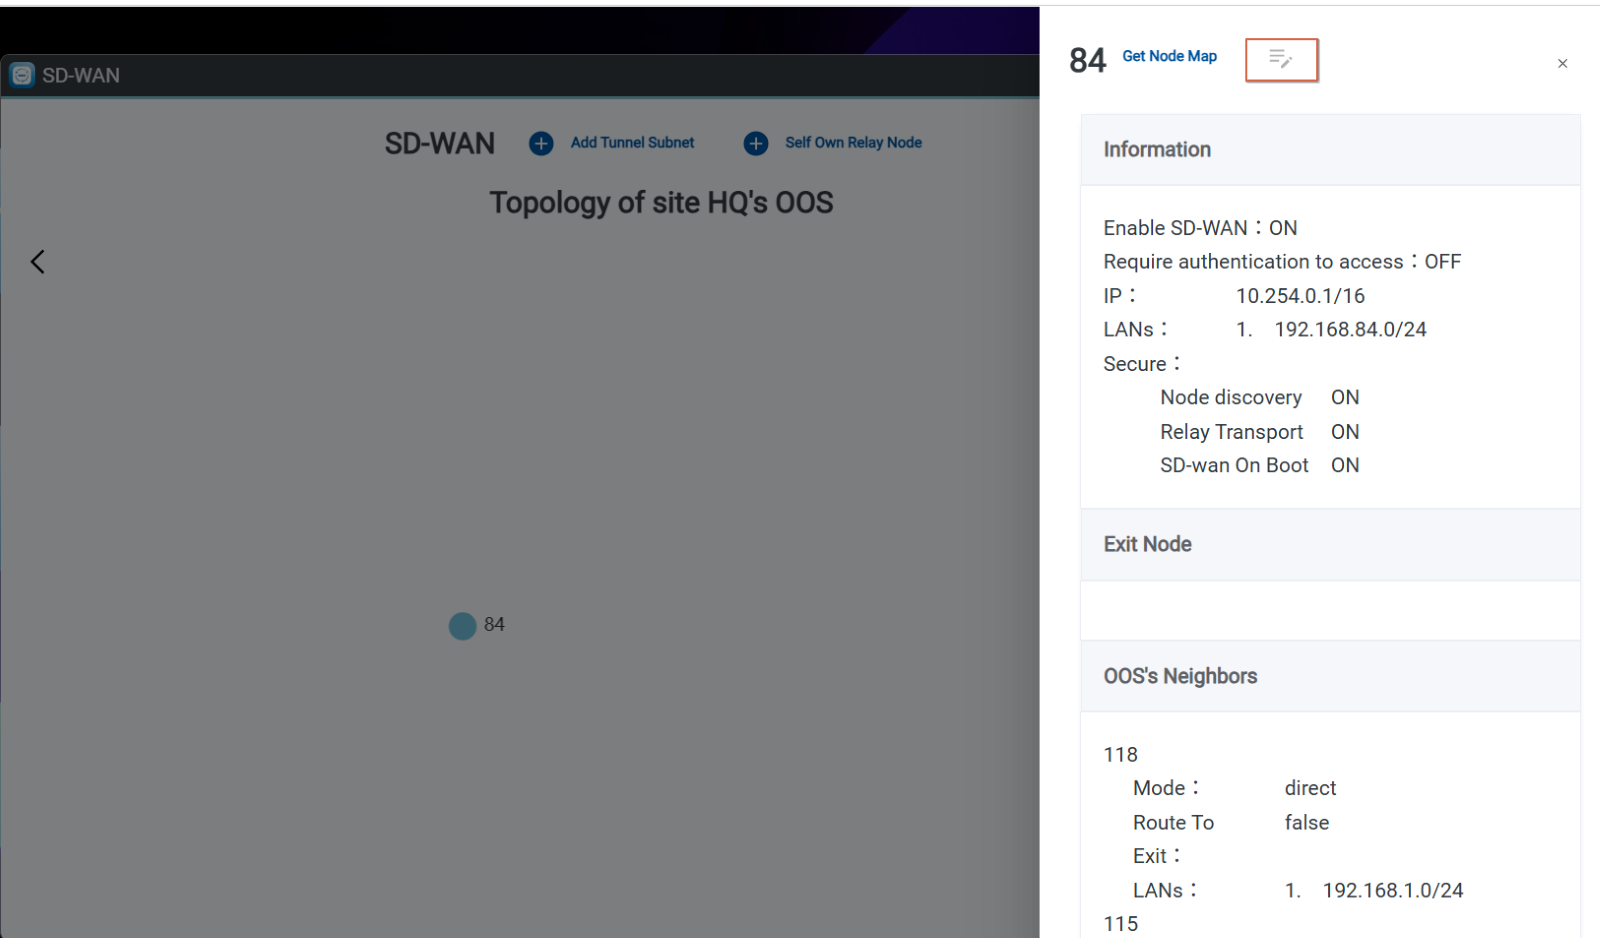
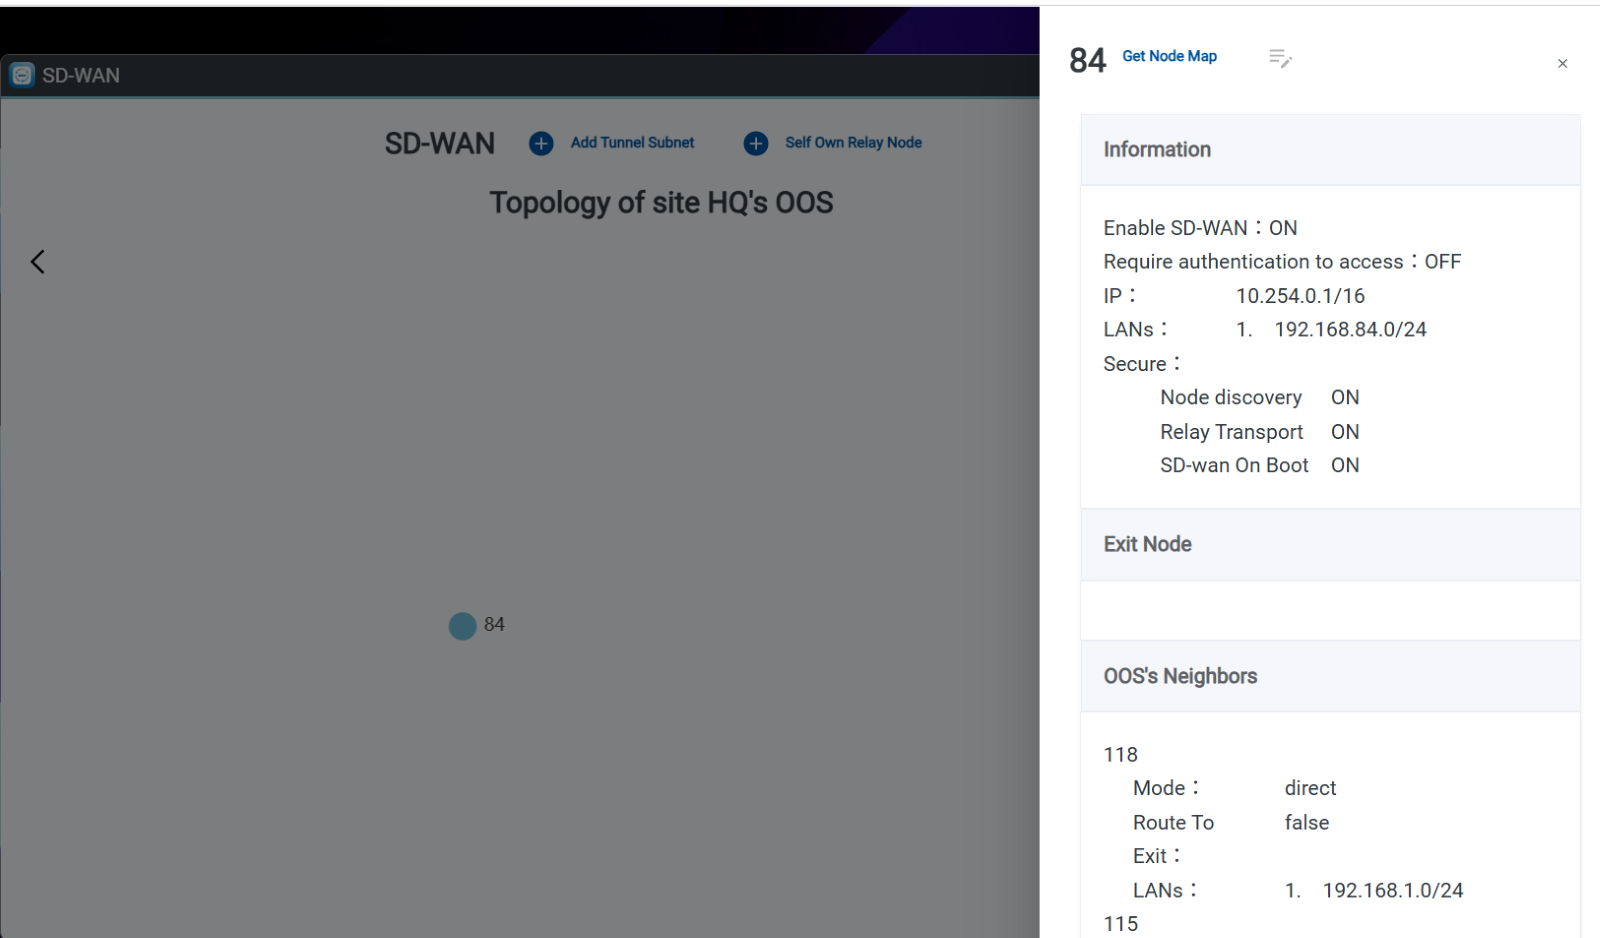
Each node can be configured with specific SD-WAN security mechanisms. The key settings include Node Discovery, Relay Transport, and SD-WAN on Boot, as described below:
1. Node Discovery (Default: Disable)
-
- Enable: Improves NAT traversal capability, but connections may be flagged as suspicious, potentially triggering firewall alerts.
-
- Disable: Connects to O'Prueba’s relay node or a customer's self-own relay node to achieve NAT traversal.
2. Relay Transport (Default: Enable)
-
- Enable: When a direct connection fails, forwards traffic to another node via a relay node.
-
- Disable: Does not allow traffic forwarding via a relay node.
3. SD-WAN on Boot (Default: Enable)
-
- Enable: Establishes the SD-WAN connection automatically after rebooting the node.
-
- Disable: Establishes the SD-WAN connection manually after rebooting the node, which can be done via the Controller or the OOS interface.
Setup Secure Option
-
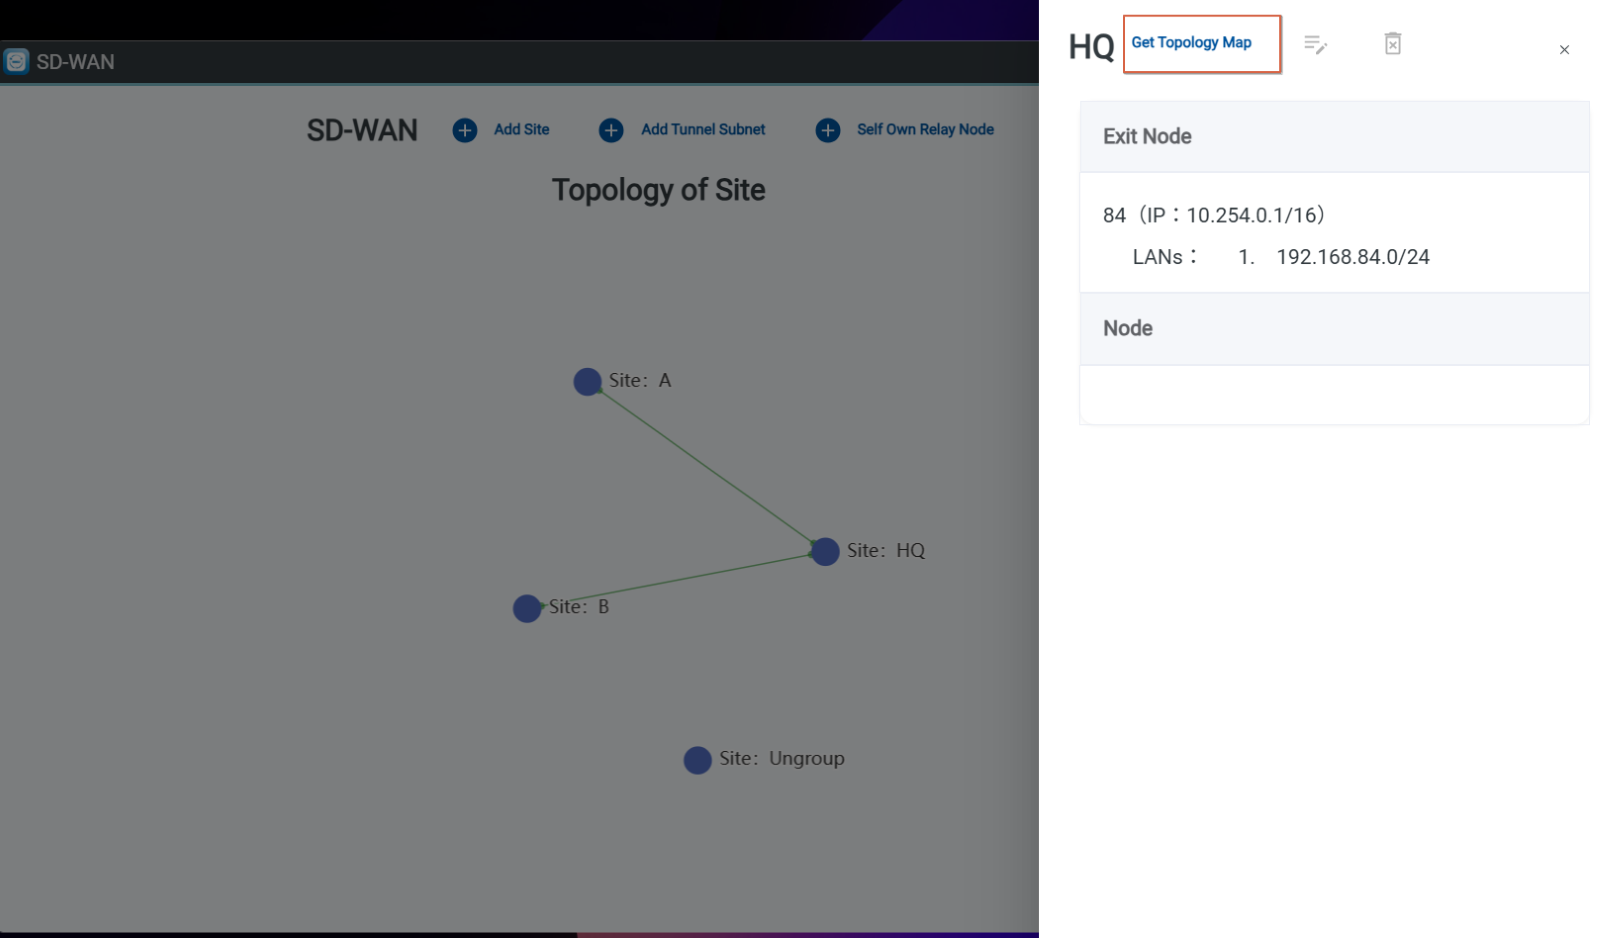
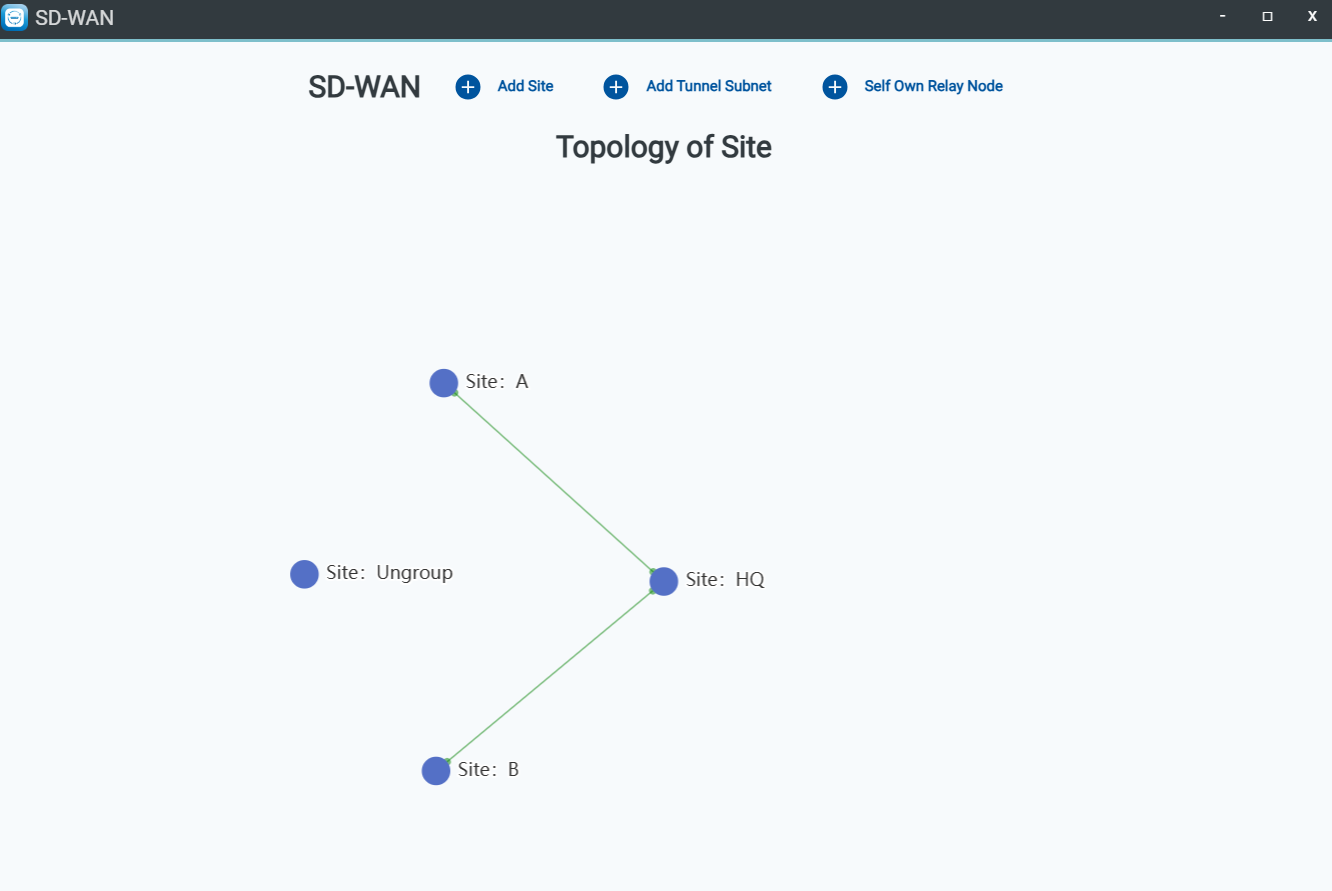
Step 1: Click SD-WAN icon
-
Step 2: Click the Site and Get Topology map
-
Step 3:Click the node

-
Step 4: Click Edit Button
Setup Authentication to access SD-WAN:
This setting requires clients to enter valid credentials (username and password) before they can access other device through SD-WAN.
-
Step 1. Click SD-WAN icon
-
Step 2. Click the site and Click Get Topology Map

-
Step 3. Click the Edit button
-
Step 4. Enable the "Require Authentication to Access" toggle and setting Access timeout

-
Step 4. Click Save icon
-
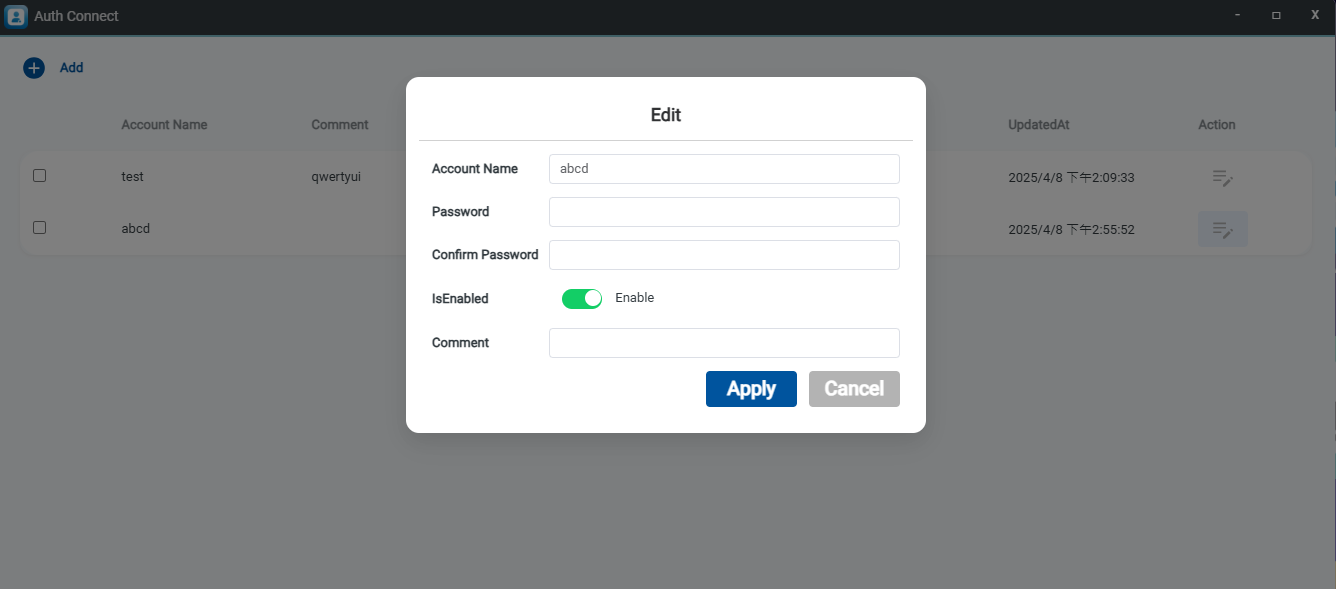
Step 5. Go to Auth Connect and Add Account name and password.
-
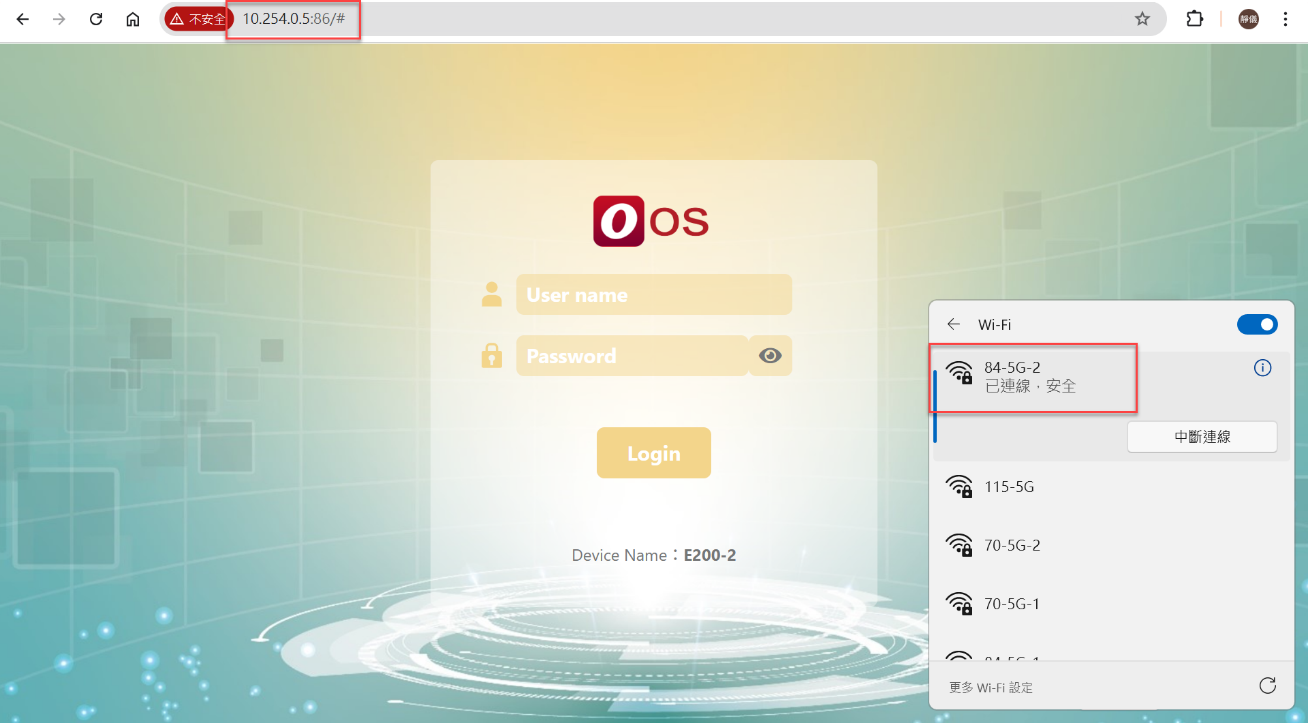
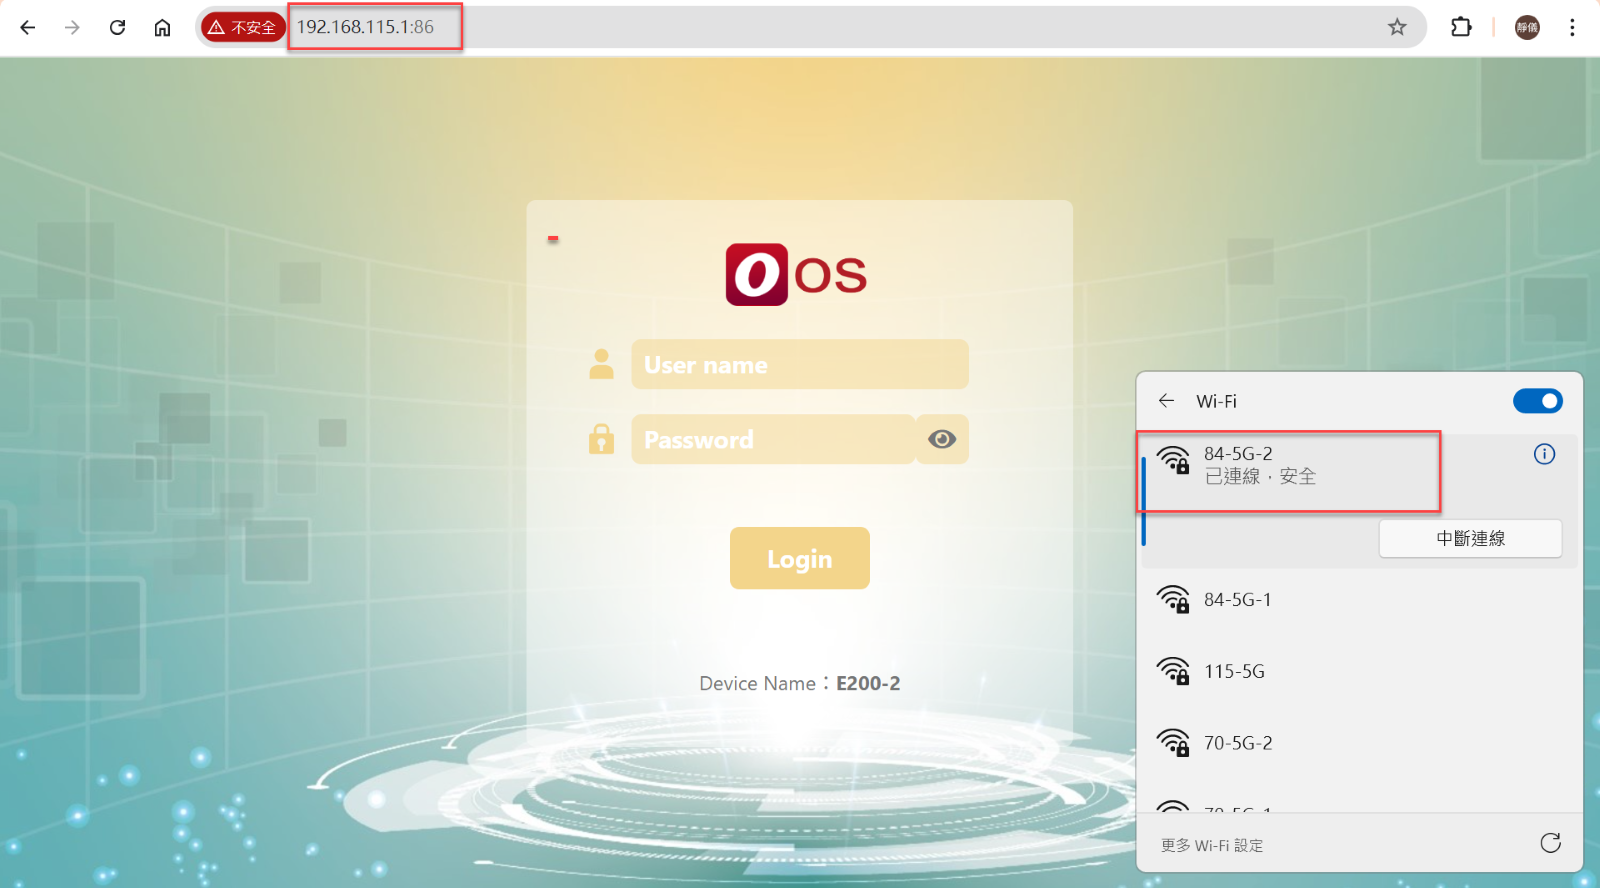
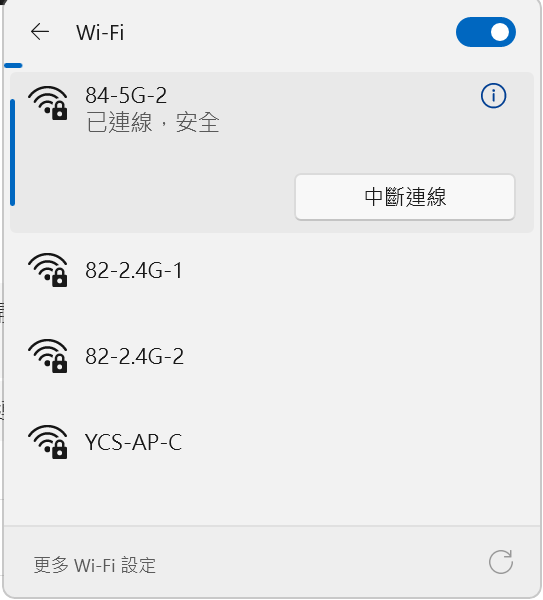
Step 6. Notebook connect OOS 84’S WiFi SSID 84-5G-2
-
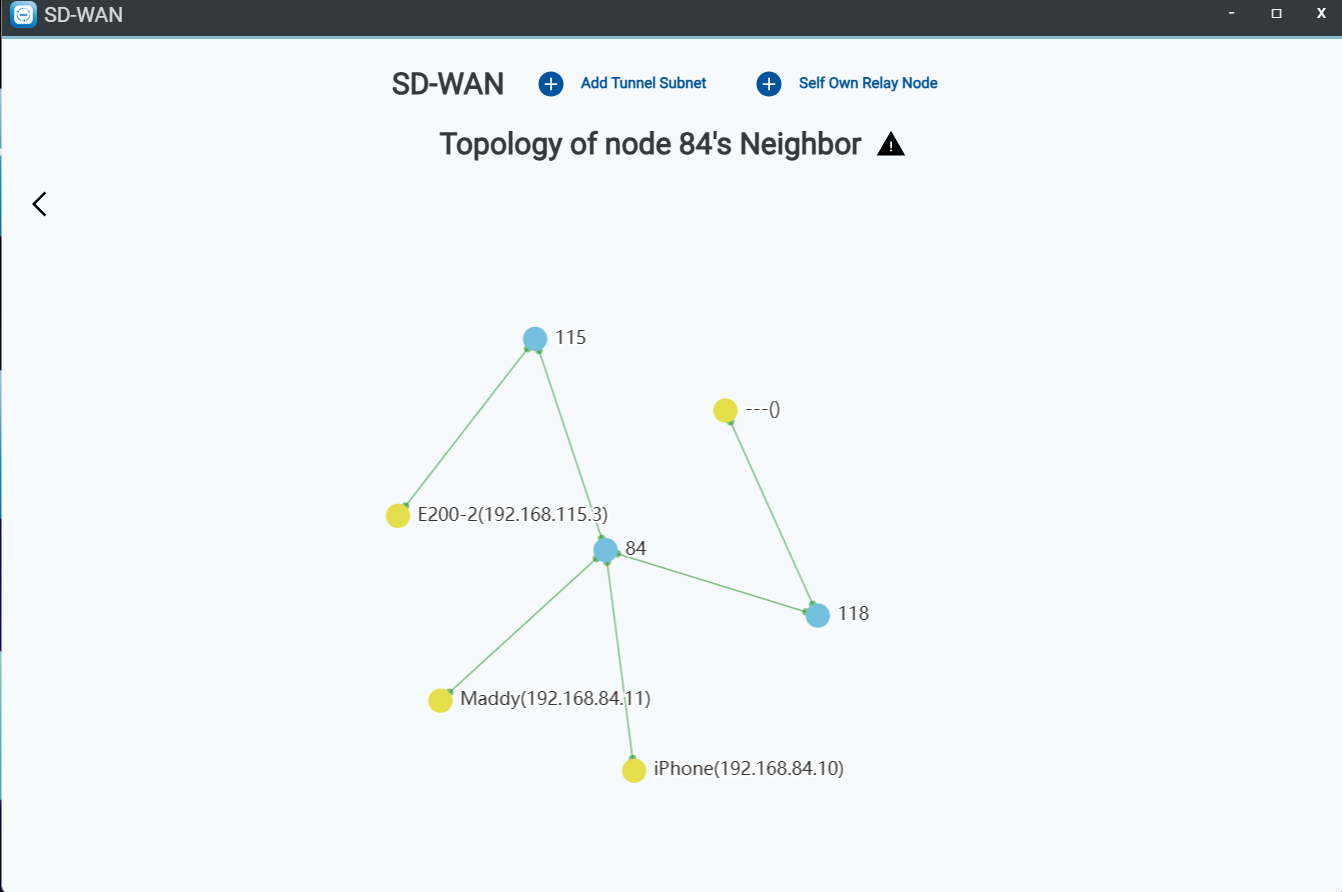
Step 7.Go to SD-WAN ,Click the Site and Get Topology Map, Click Node 84 and Get Node Map
-
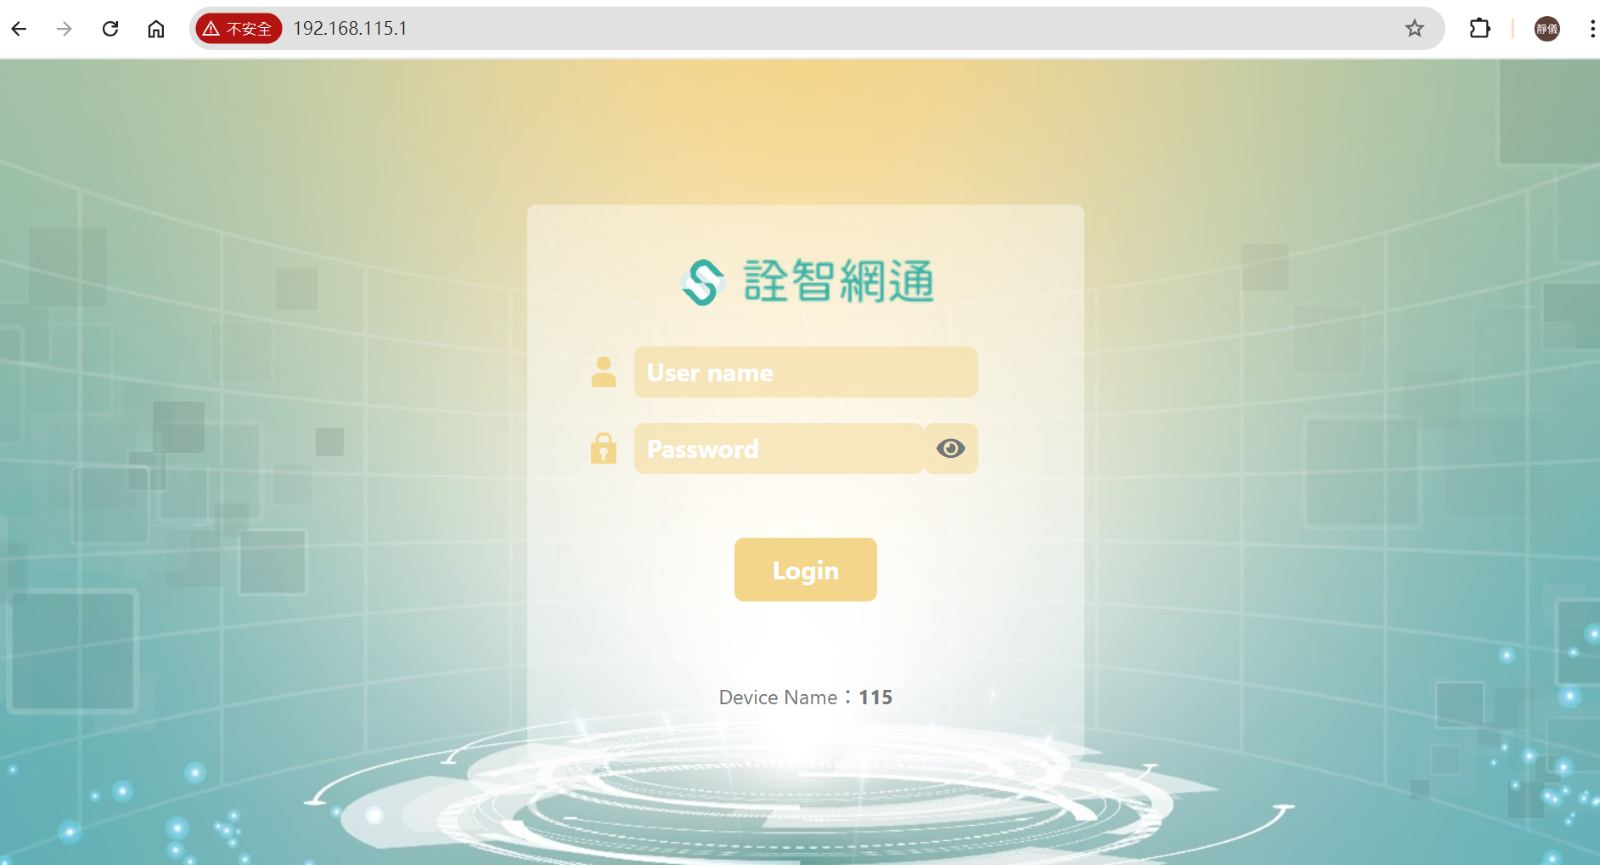
Step 8. Entering Node 115 LAN IP (192.168.115.1), you'll be redirected to a portal page.
-
There, input your username and password, and then click "login" to proceed.
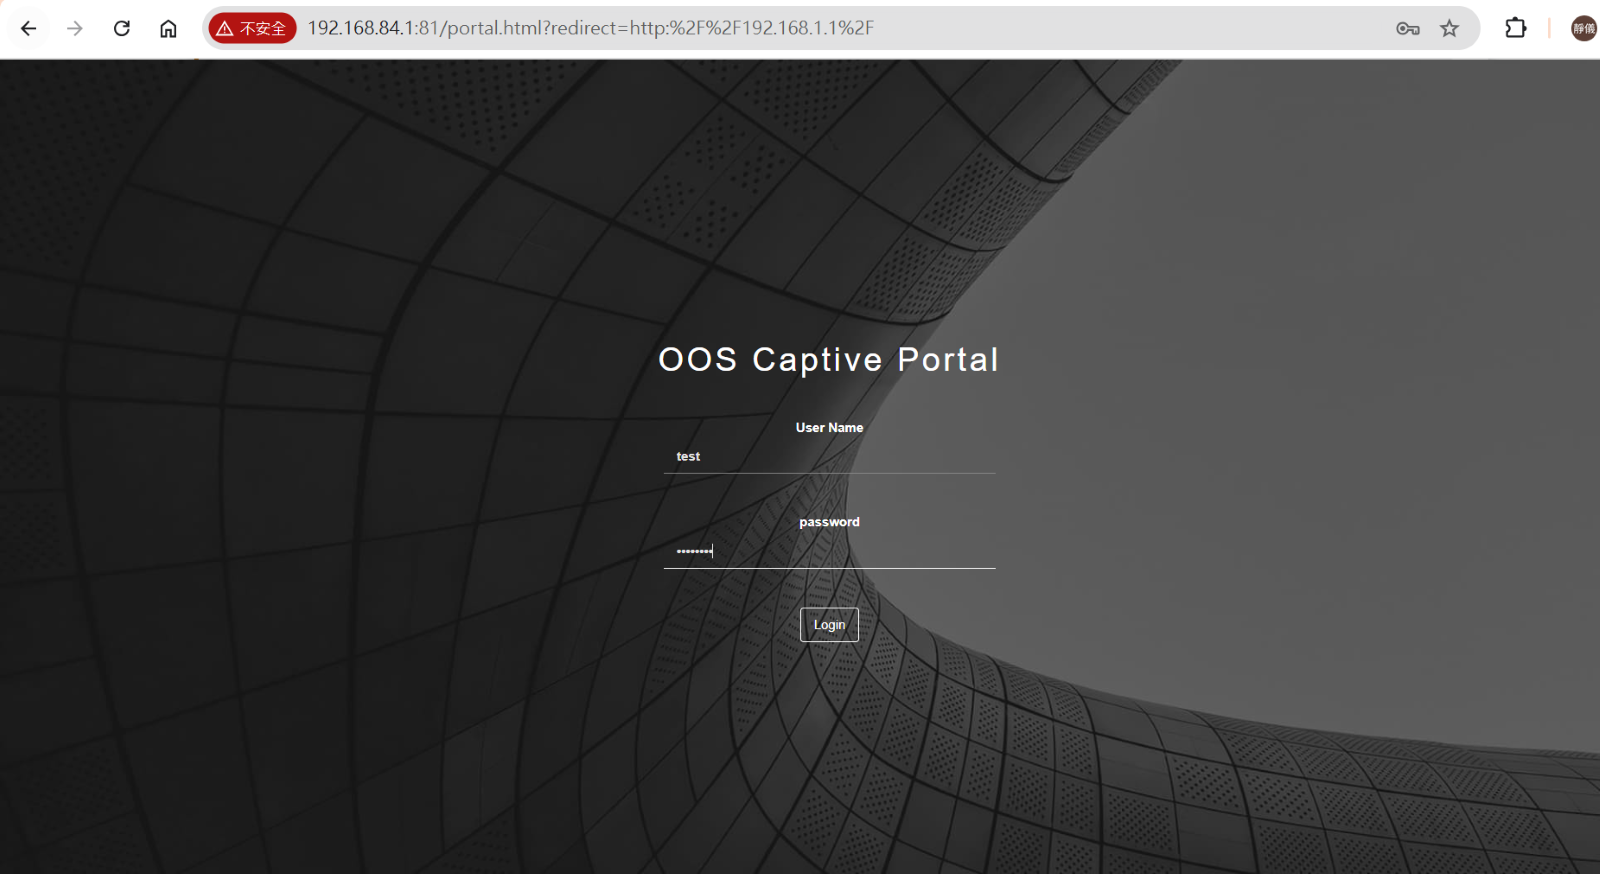
Step 9. After login, Node 115 is accessible.
SD-WAN Port forwarding
Port Forwarding allows clients under one OOS node to access client devices under another OOS node by configuring forwarding rules. This is particularly useful for scenarios where branch offices or remote users need to access specific services or data hosted within the headquarters' network.
Port Forwarding Setup
-
Step 1.Click SD-WAN APP
-
Step 2. Click the site and Get Topology Map
Step 3. Click the node 84 and Get Node Map.
To set up Node 84's client "Maddy" to access the client device "E200-2" located behind Node 115. 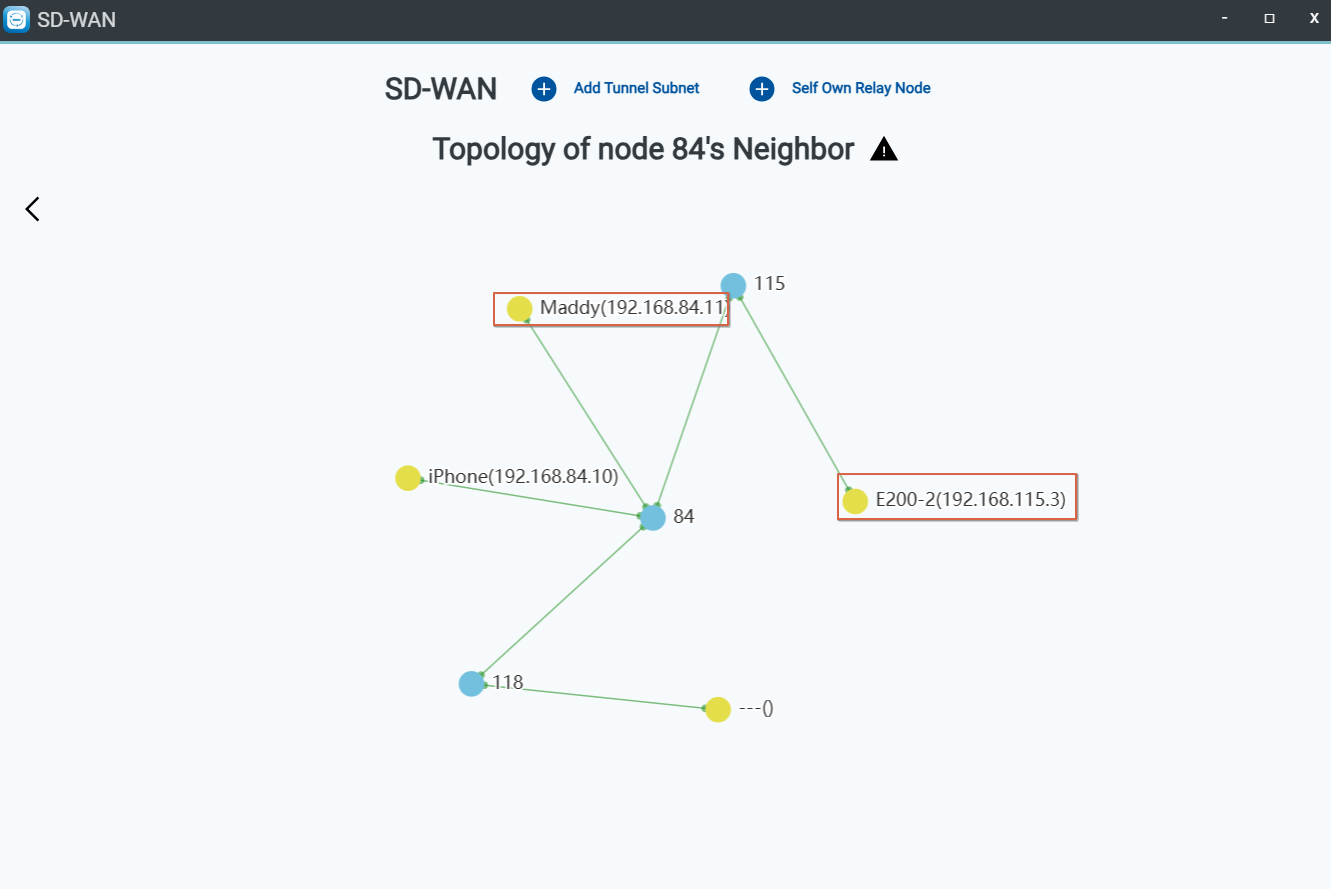
-
Step 4. Click the Client " E200-2"
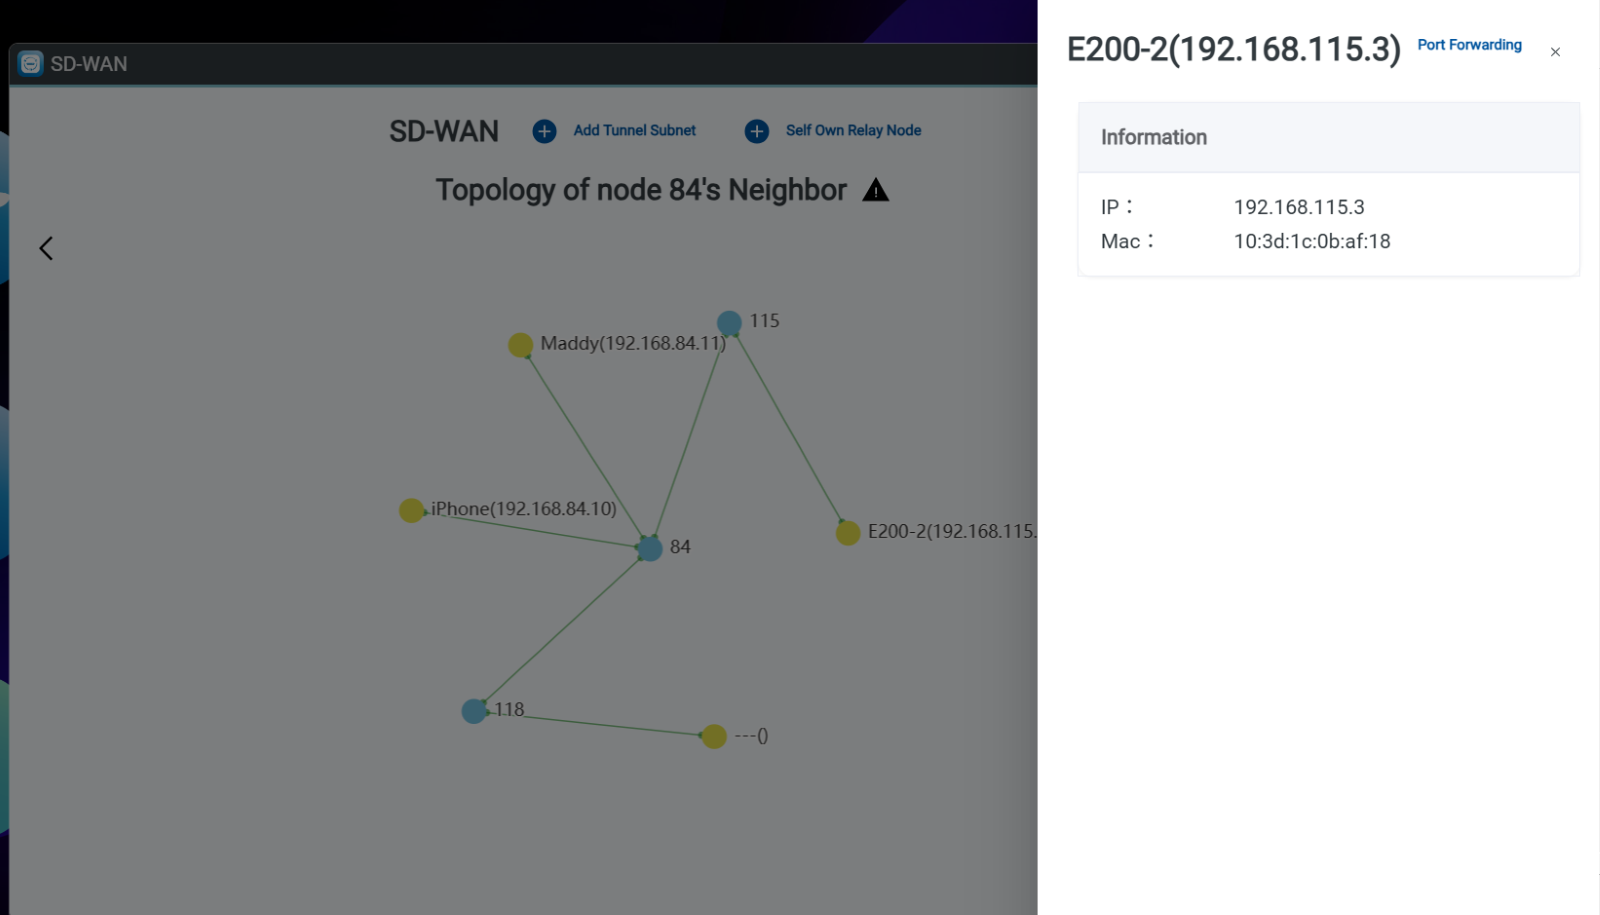
Step 5.Click Port forwarding and Add Protocol, LAN Destination Port and Tunnel Source Port.
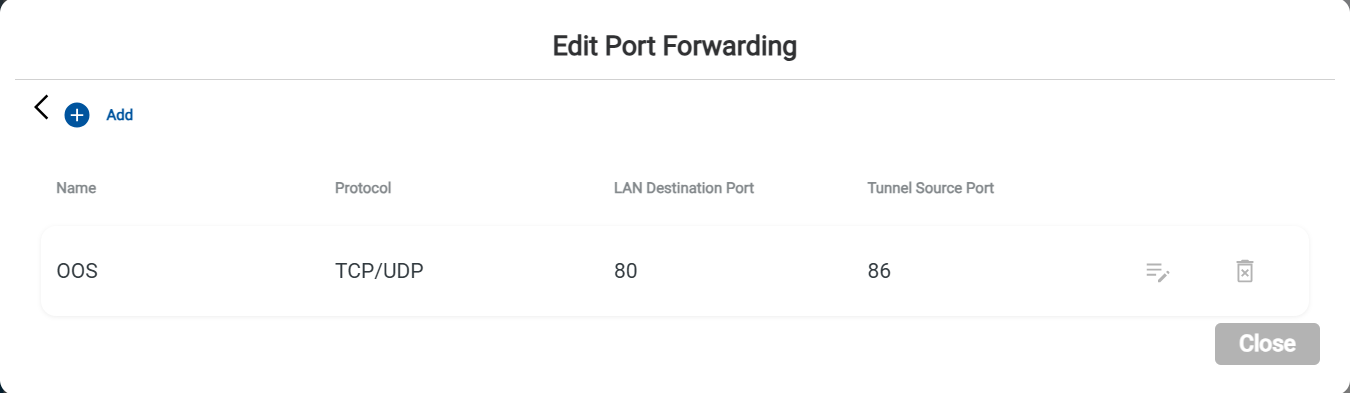
Step 6. Enter the LAN or Tunnel IP with the port, such as 192.168.115.1:86 or 10.254.0.5:86, to access the "E200-2" device.